How to replace Calendly by Google Appointment Schedules
Looking to replace Calendly with a free alternative? Google Appointment Schedules, included with Google Workspace, offers a built-in scheduling solution directly inside Google Calendar. This guide explains the key differences between Calendly and Google Appointment Schedules, pricing comparisons, feature breakdowns, and step-by-step setup instructions. Learn how to create booking pages, customize availability, share scheduling links, and fully integrate appointments with Google Calendar — without paying for external scheduling software.
Creating Your Appointment Booking Page
After clicking "Create," enter the title for your booking page (e.g. "Apartment consultation").
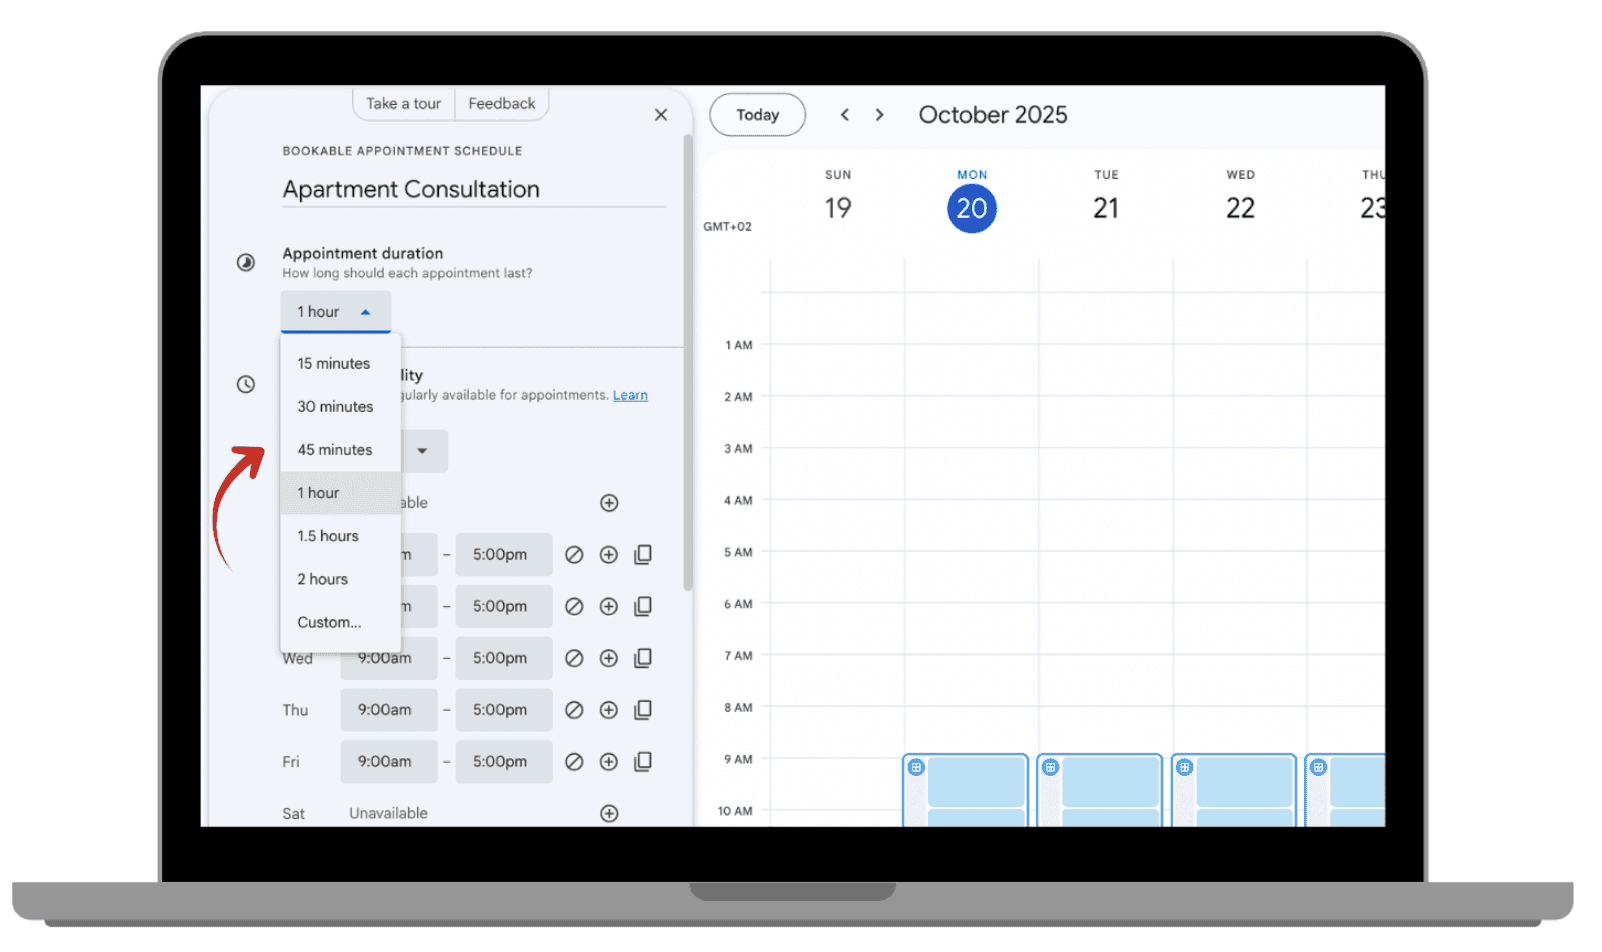
Set the appointment duration with the drop down time options.
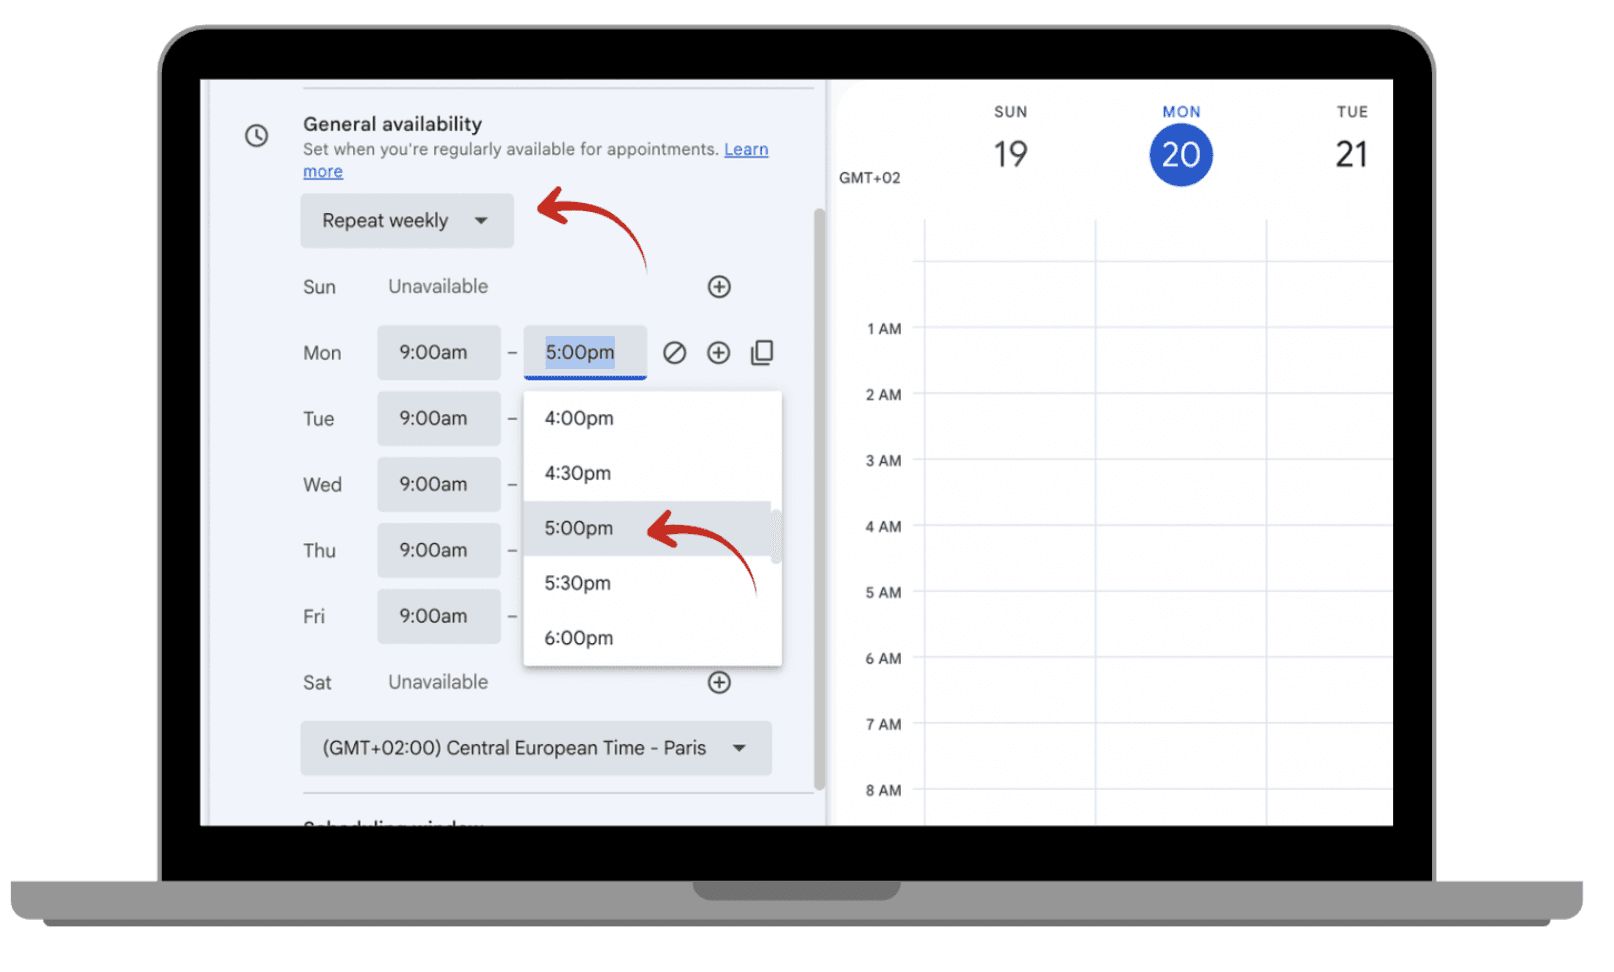
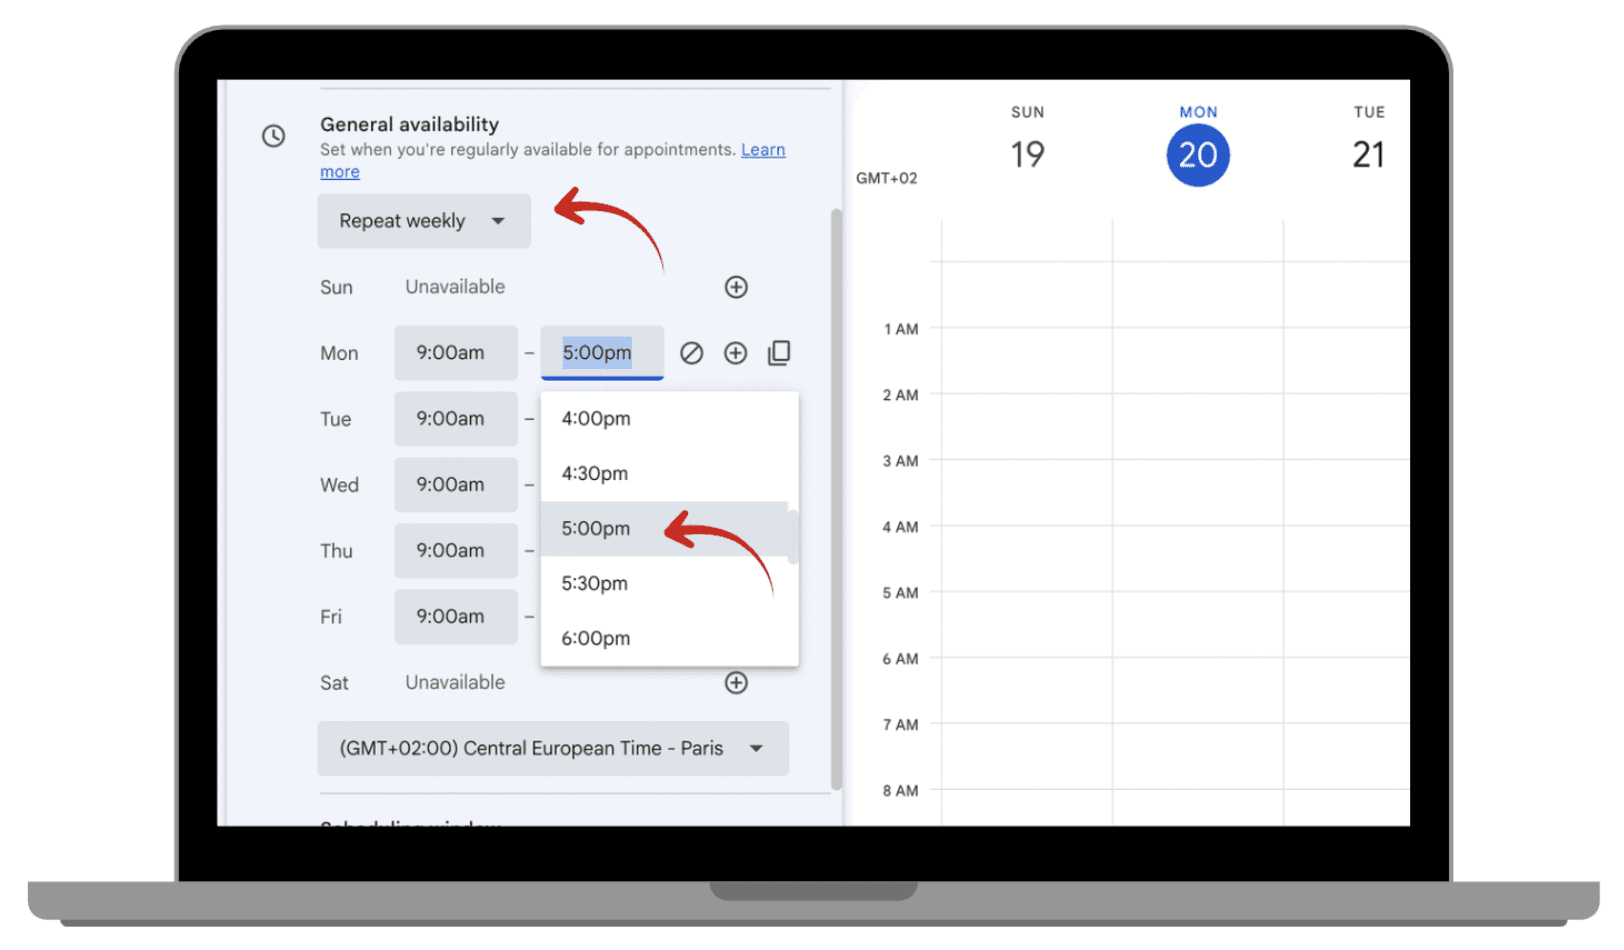
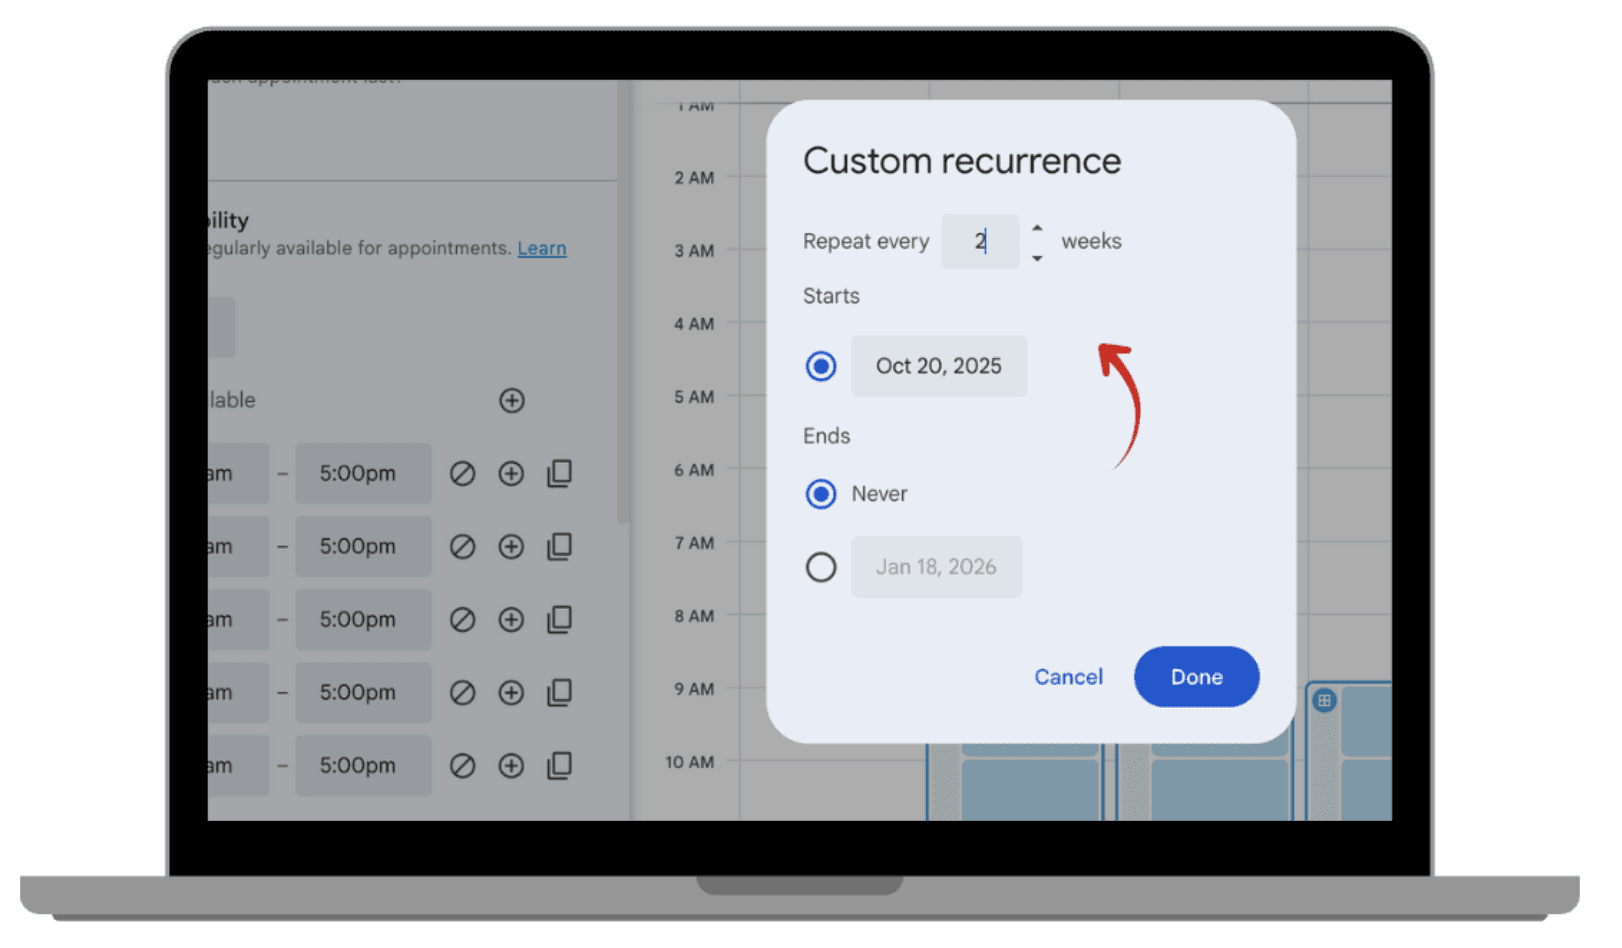
You can customize your general availability by adjusting how often you're available and setting specific times for each day.
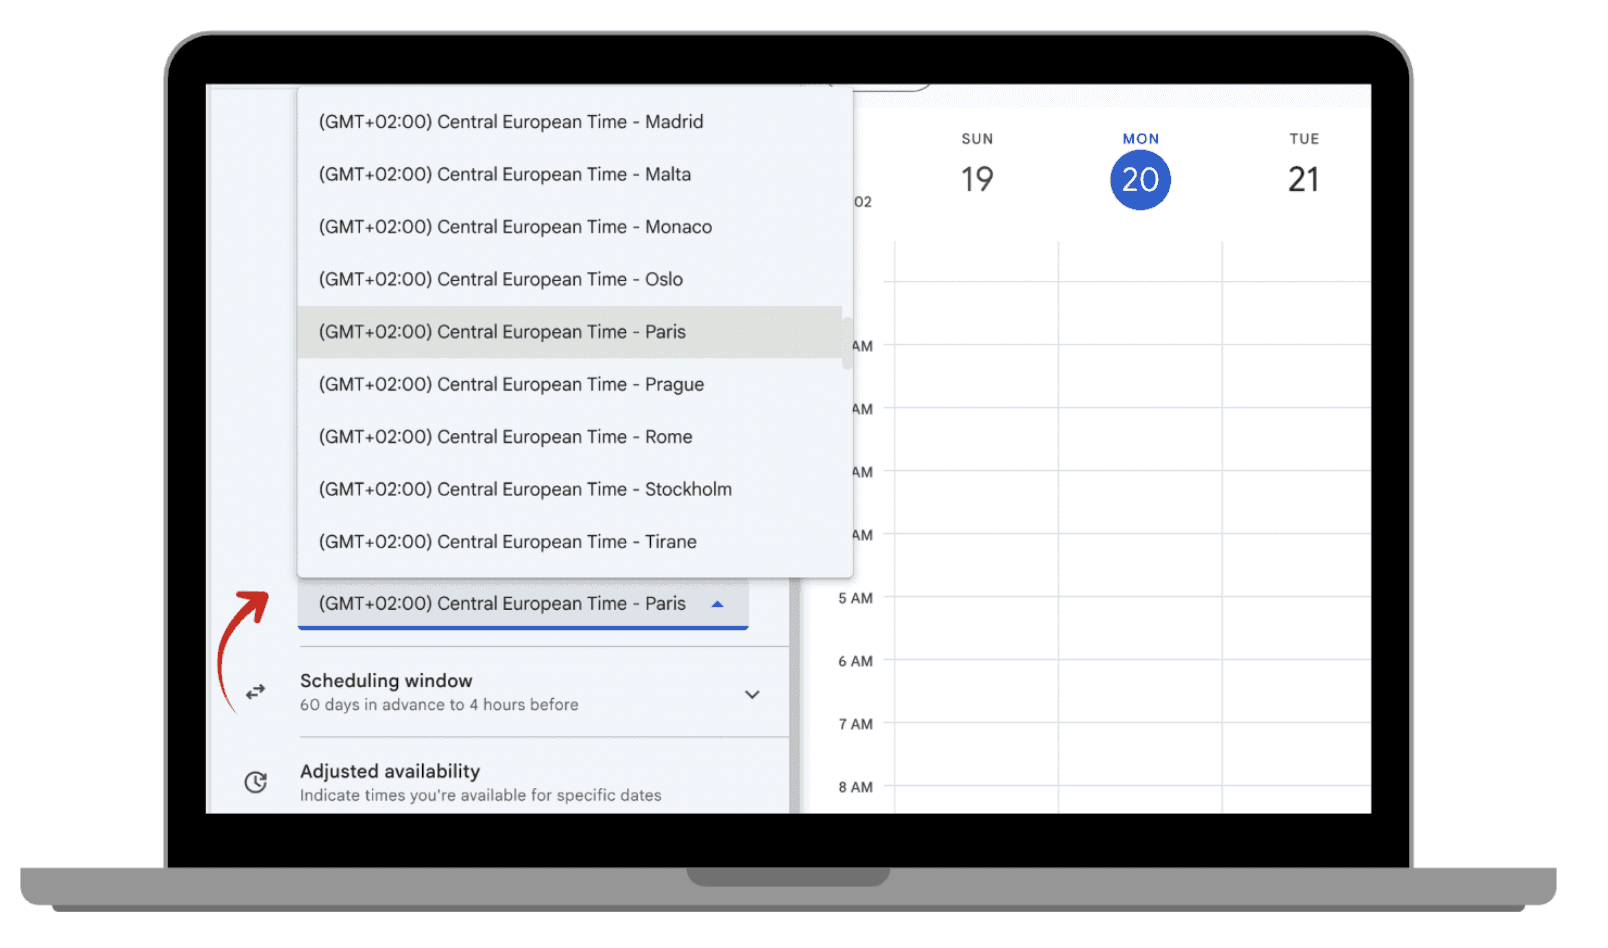
Choose your time zone settings.
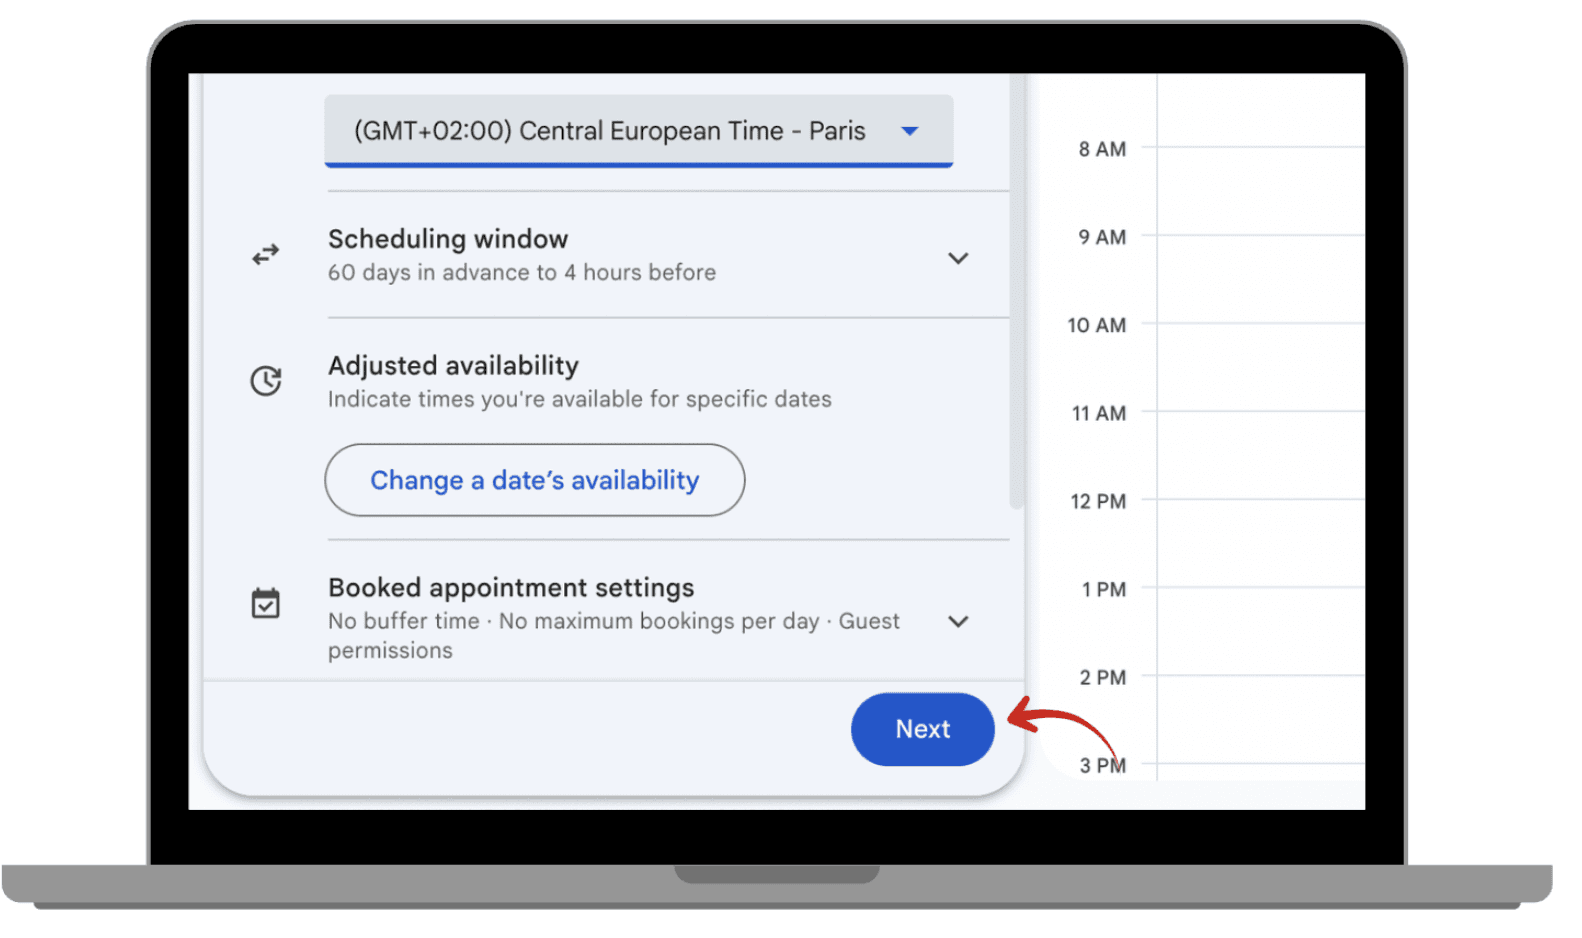
Click ‘Next’.
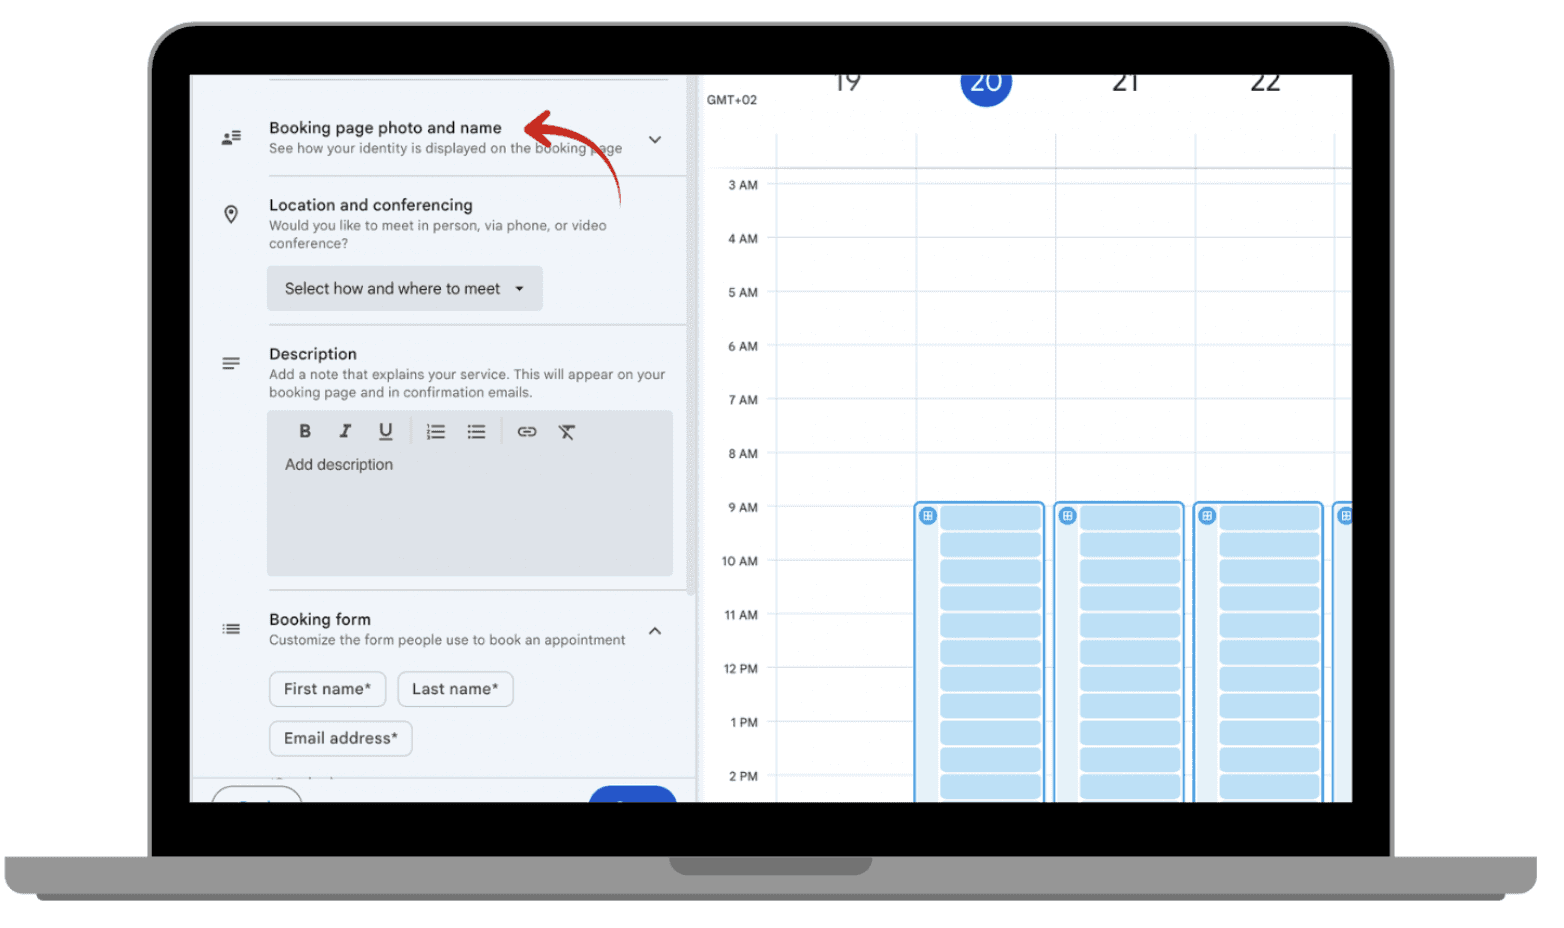
Here you can set your appointment picture and name that will show up for users.
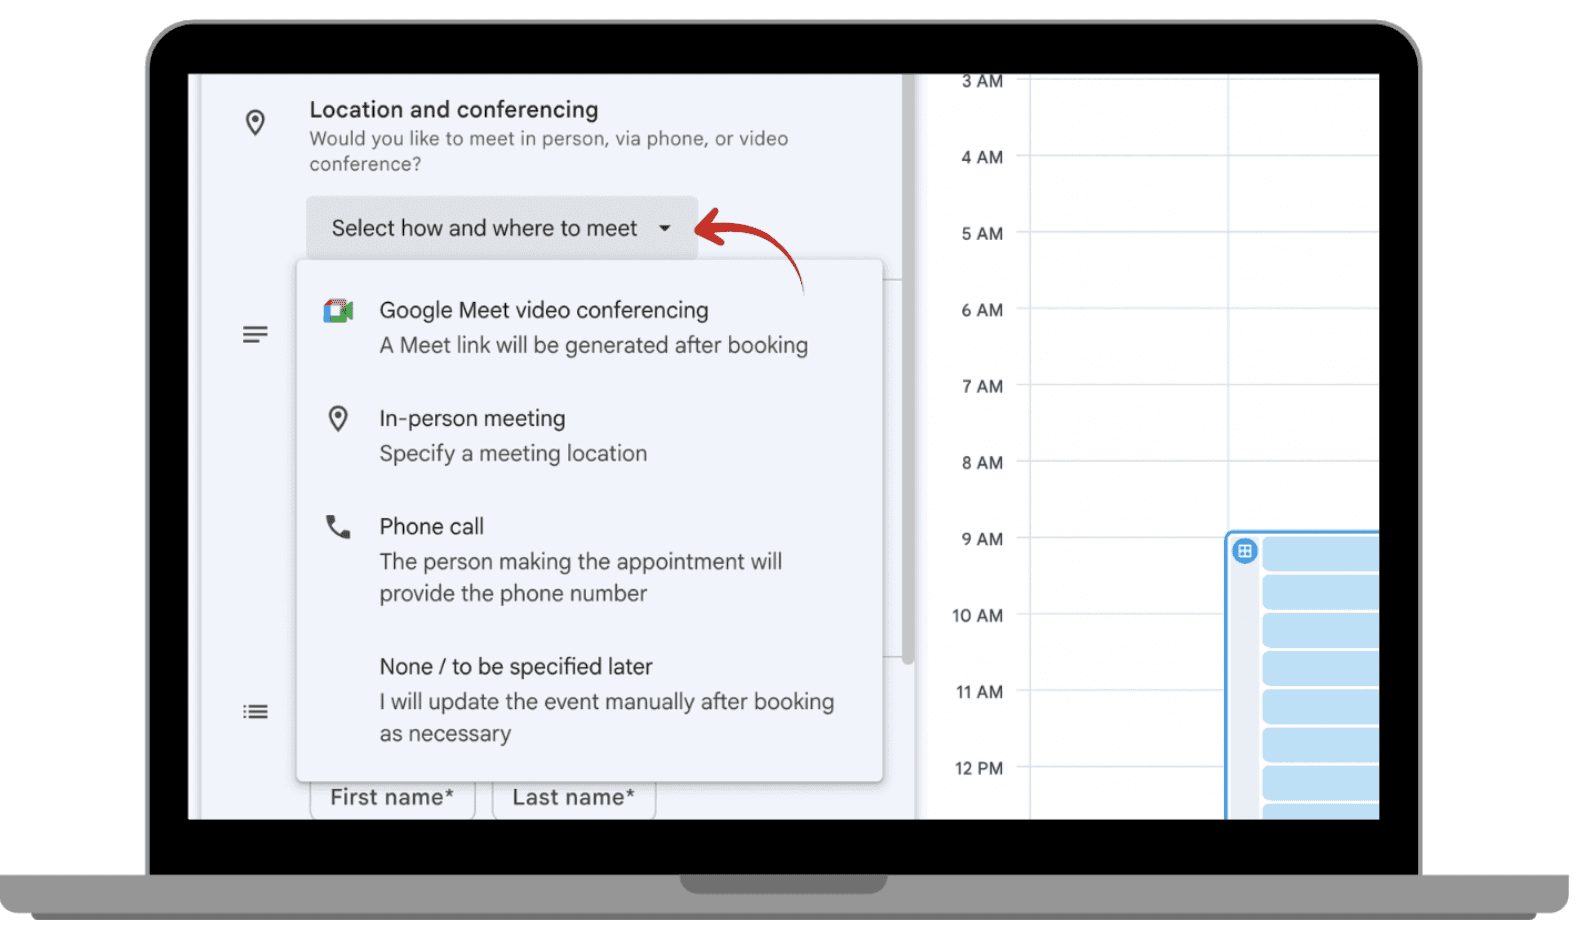
You can set your place of meeting, whether it’s online or elsewhere.
Add a description that explains your service or reason for a meeting.
And you can add a section to customize the booking form for people to fill in when setting an appointment.
Save your page.
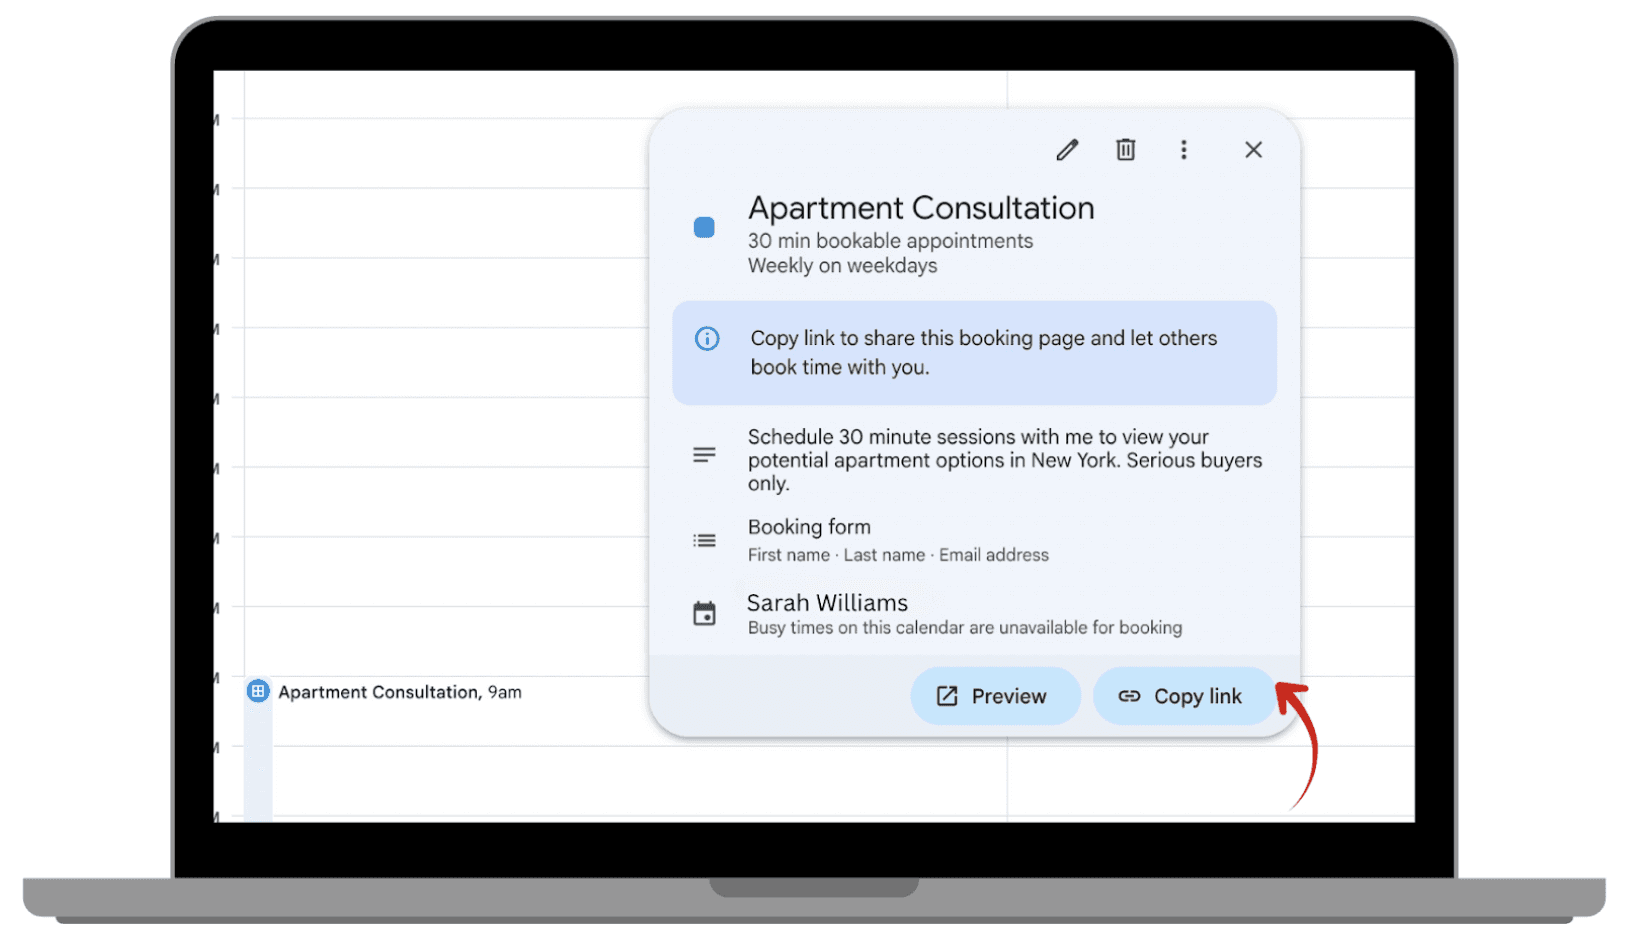
You’ll receive a shareable link to your booking page. This link is what you’ll send to people who want to book time with you.


1. Why Switch from Calendly to Google Appointment Schedules?
Calendly is a popular scheduling tool, but if you're already using Google Workspace, you might want to consider Google Appointment Schedules as a free alternative. It integrates seamlessly with Google Calendar and offers similar features, such as appointment types, customizable availability, and automatic syncing between accounts.
Moreover, Calendly offers several pricing plans: the Free Plan at $0/month with limited features, the Standard Plan at $10/month offering more integrations and customization, the Teams Plan at $16/month per user for team scheduling, and the Enterprise Plan starting at $15,000/year for advanced security and support.
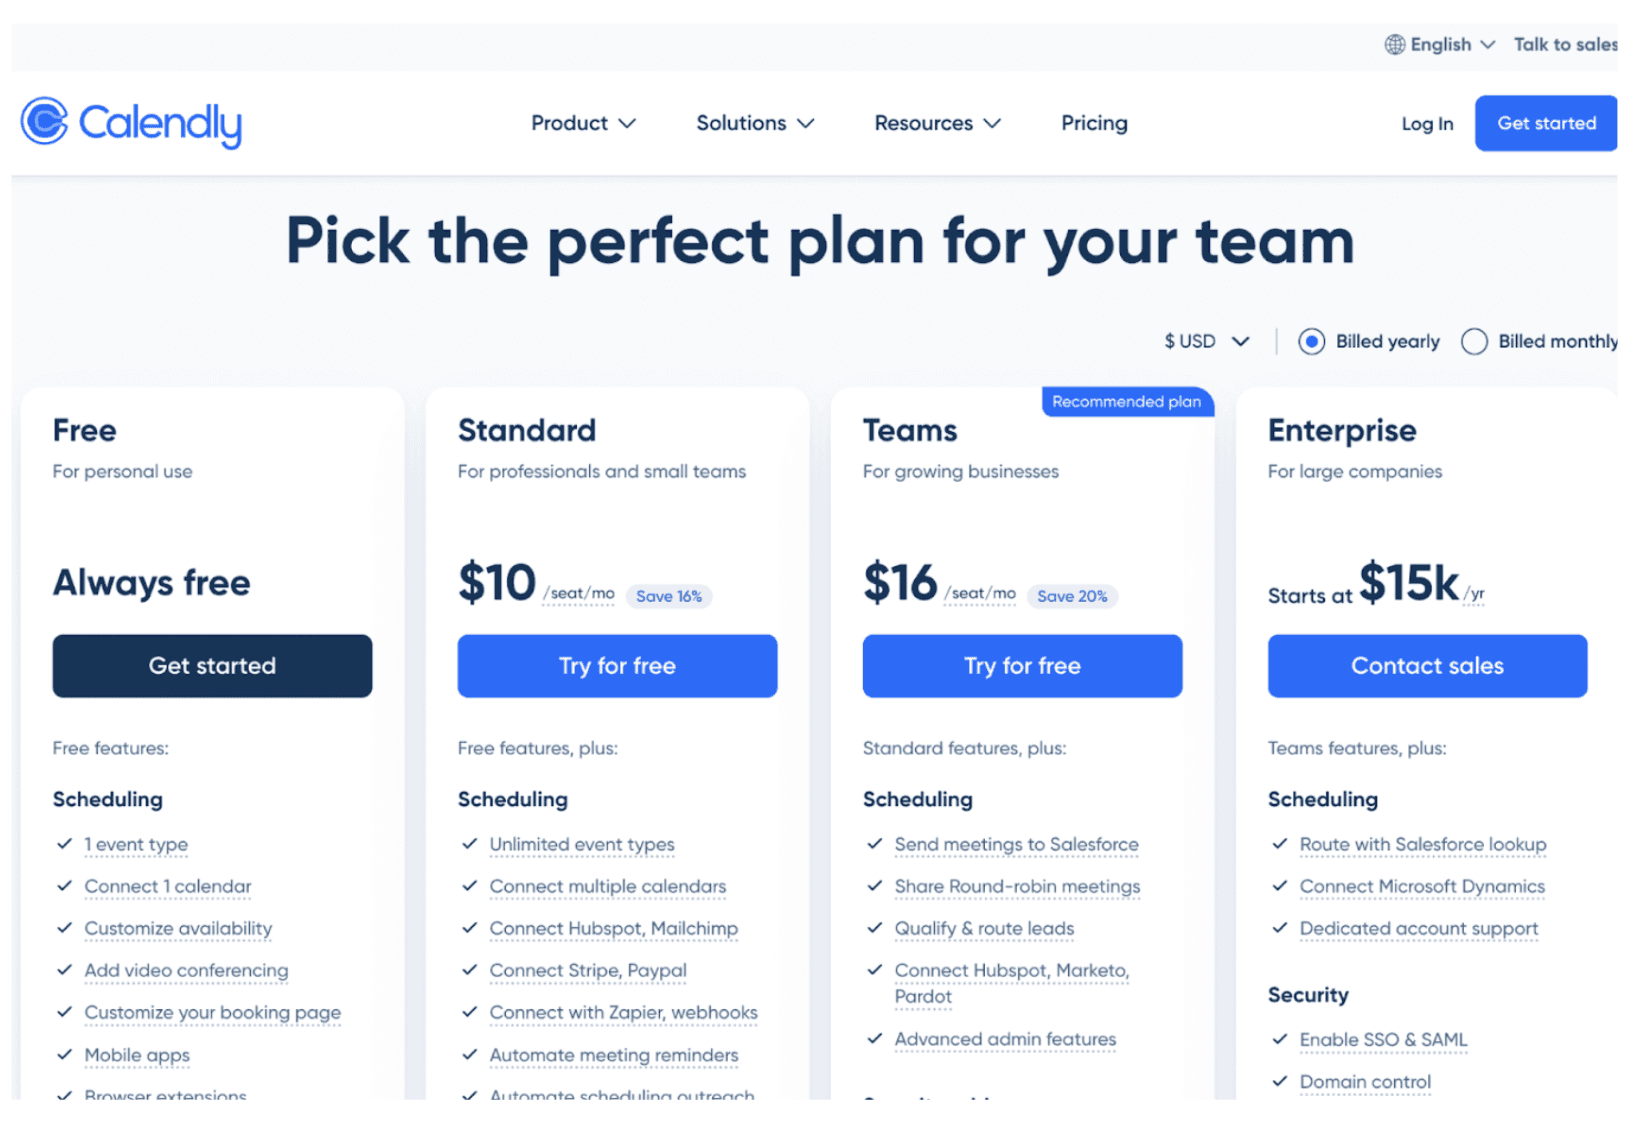
In comparison, Google Appointment Schedules is free for Google Workspace users and integrates directly with Google Calendar, saving additional costs.
2. Key Features of Google Appointment Schedules
Google Appointment Schedules has many features that make scheduling easier and more secure:
Integration with Google Calendar: Automatically syncs with Google Calendar, making it easier to keep track of your schedule in one place. This feature is especially useful for employees and companies using Google Workspace.
Customizable availability: Set your available hours for meetings, consultations, and more, ensuring you're only booked when you're free. This availability is visible to others within your domain, so when you're booked, they can see that you're unavailable during that period.
Automated time zone adjustments: Handles time zone differences for clients or colleagues across the world, making it easier to plan appointments without manually checking time zones between users in different locations.
Appointment types: Create different types of appointments (e.g. 30-minute calls, 1-hour consultations) to offer clients a variety of options. You can also customize the duration of each meeting to fit your needs.
Booking link: Generates a unique link that you can easily share with others to book time with you. This makes it easier for users to schedule the meeting, and the meeting details (such as a Zoom or Google Meet link) are automatically included, allowing them to join the call at the scheduled time.
3. Key Differences Between Calendly and Google Appointment Schedules
To help you choose the best scheduling solution for you or your organization, here’s a comparison of the key features and differences between Calendly and Google Appointment Schedules
Calendly offers more customization options and integrations, making it suitable for users who need advanced features.
Google Appointment Schedules, on the other hand, is free for Google Workspace users and integrates directly with Google Calendar, offering a more convenient solution for those already using Google services.
While Calendly’s paid plans include additional features like team scheduling and multiple event types, Google Appointment Schedules provide essential features at no cost, making it a solid choice for users seeking a budget-friendly option, while requiring sufficient features.
Whether you're an individual or part of a larger team, these tools offer distinct features to simplify scheduling, with Google Appointment Schedules providing a free, integrated solution for Google users and Calendly offering more customization and paid options for advanced needs.
4. Setting Up Google Appointment Schedules for the First Time
Follow these simple steps to set up Google Appointment Schedules and start managing your bookings efficiently.
4.1. Accessing Google Appointment Schedules
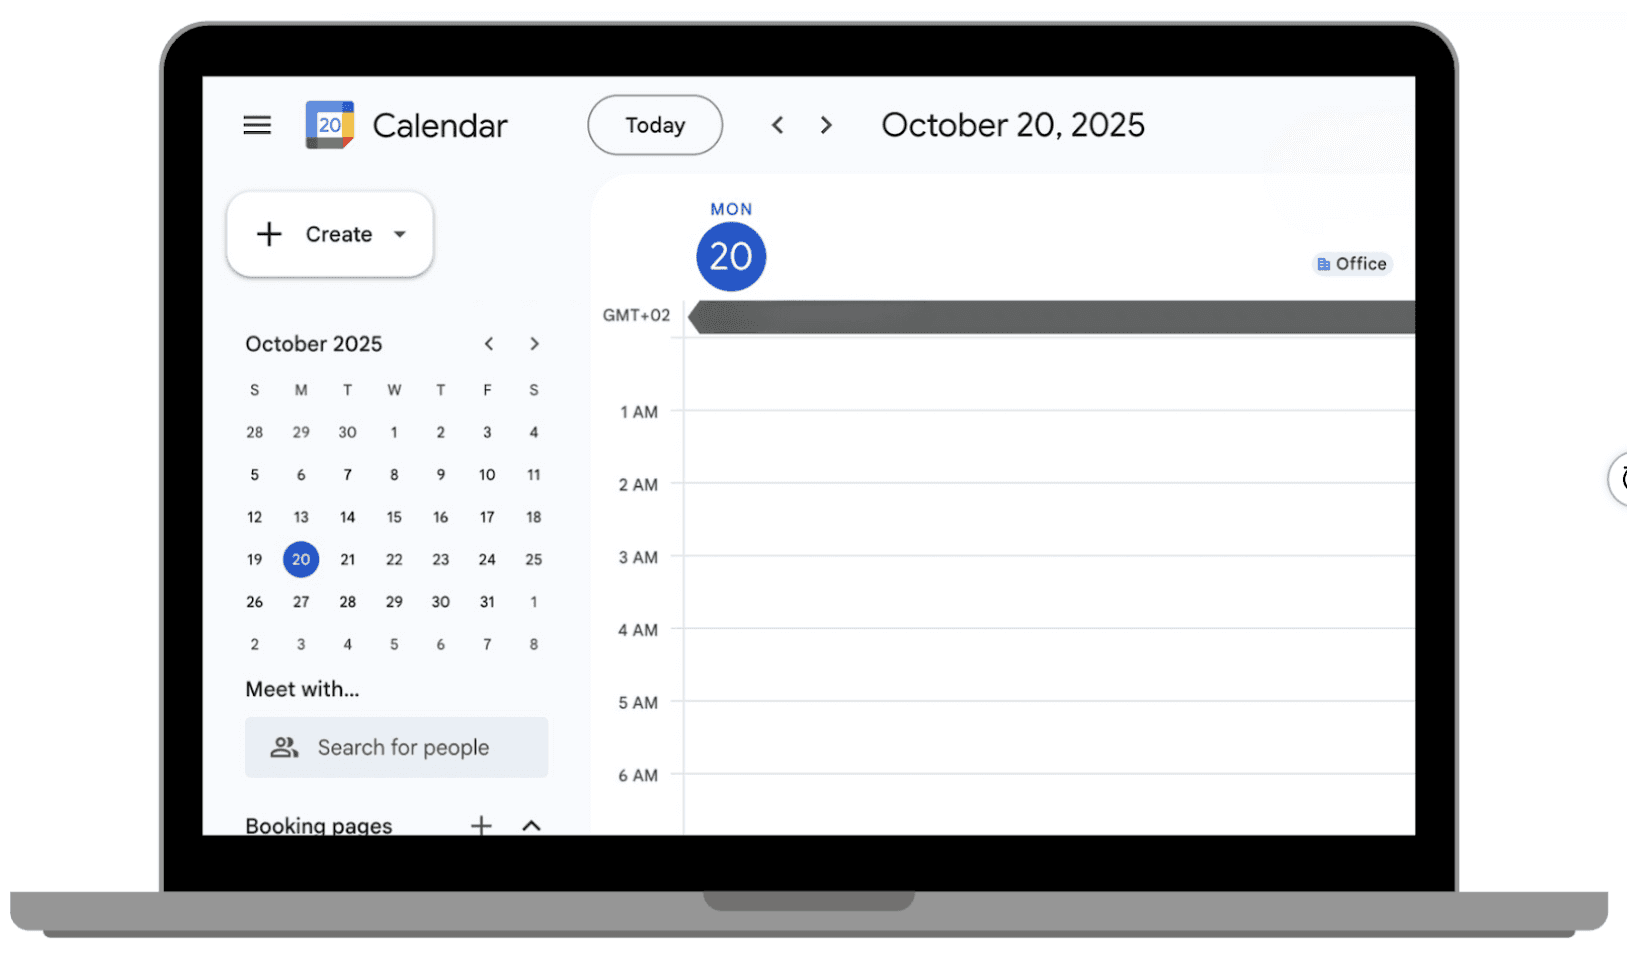
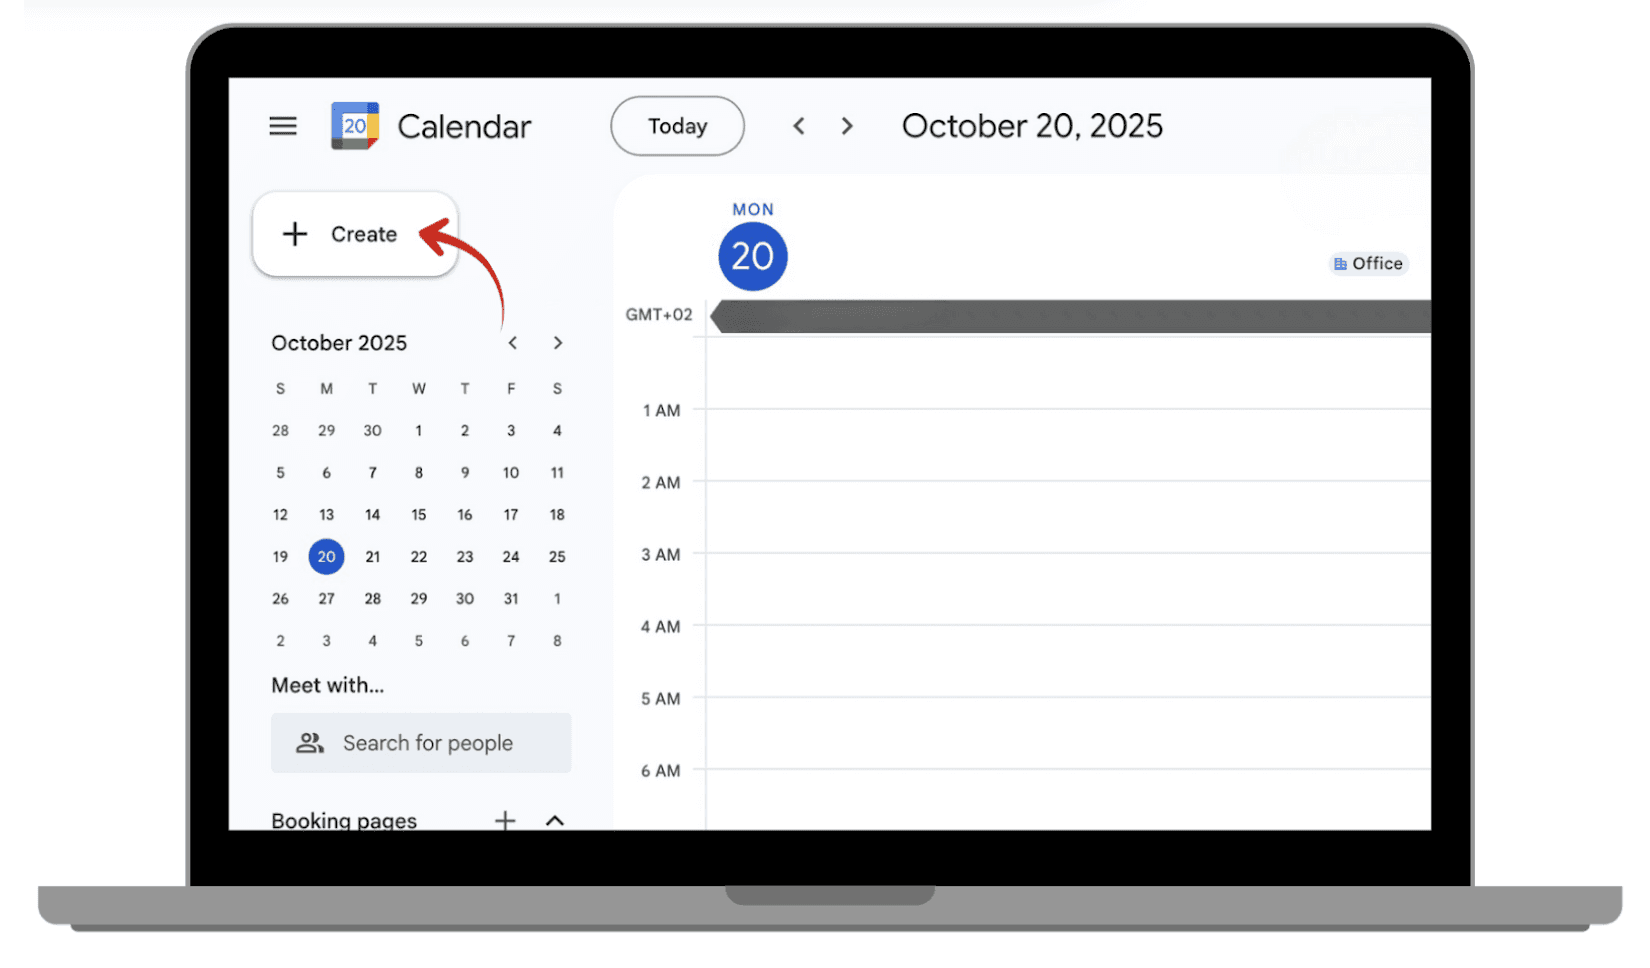
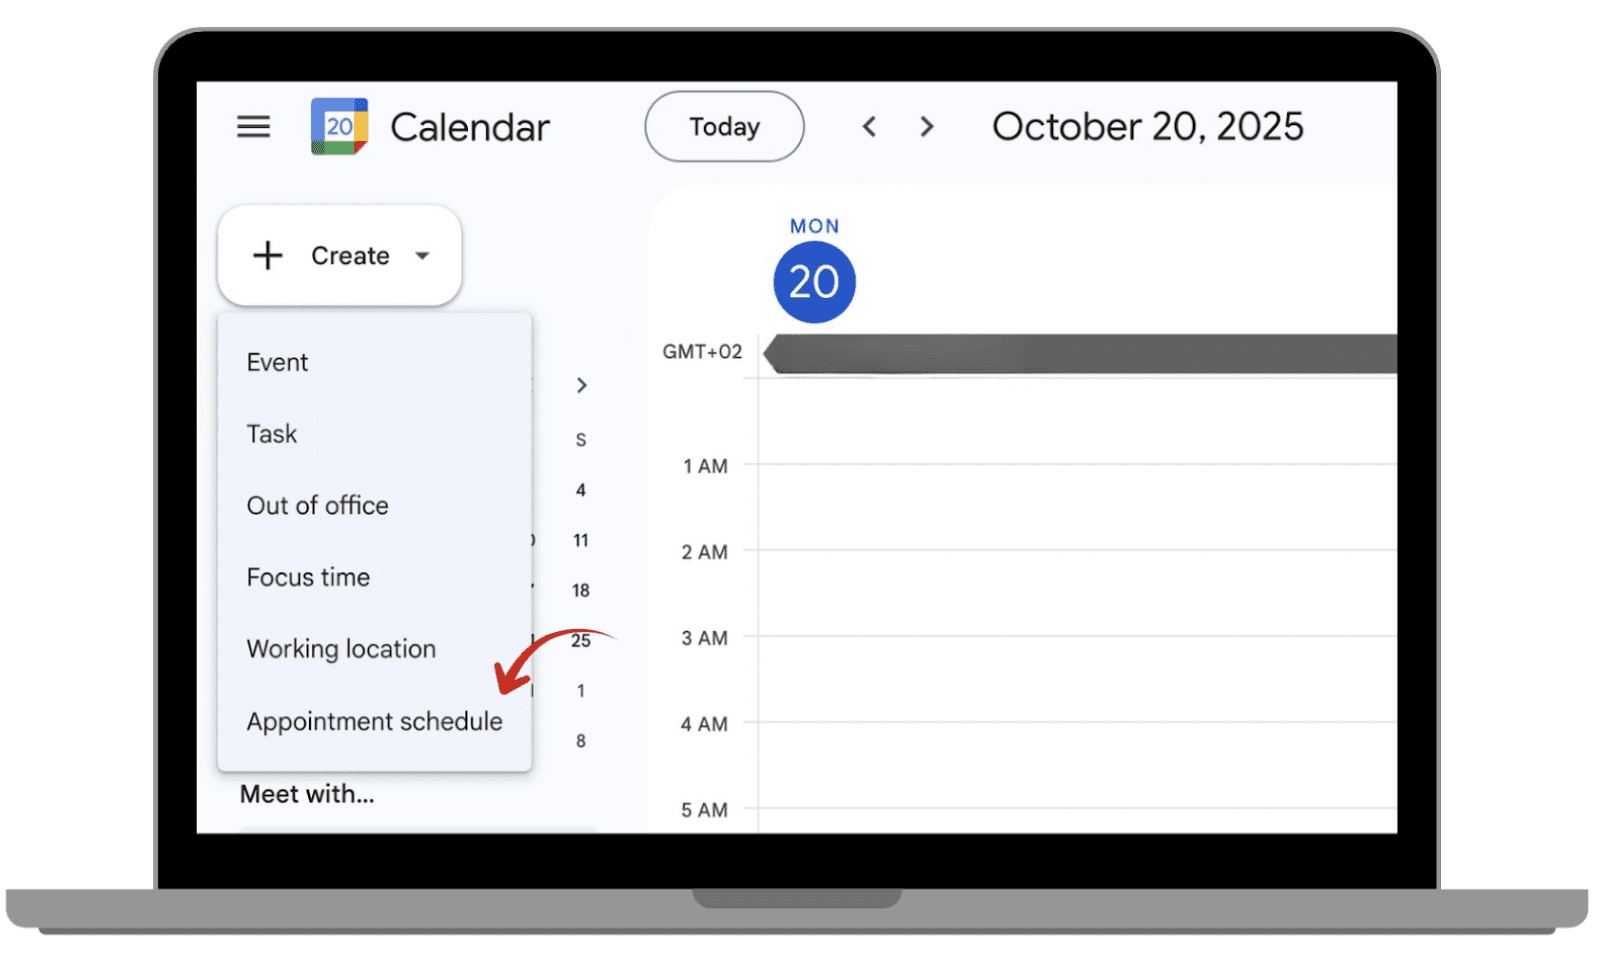
Open Google Calendar.
On the left side of the screen, click the “Create” button.
Select “Appointment schedule”.
Now you can create your first appointment schedule!
 |  |
|
|
 |  |
|
|
4.2. Creating Your Appointment Booking Page
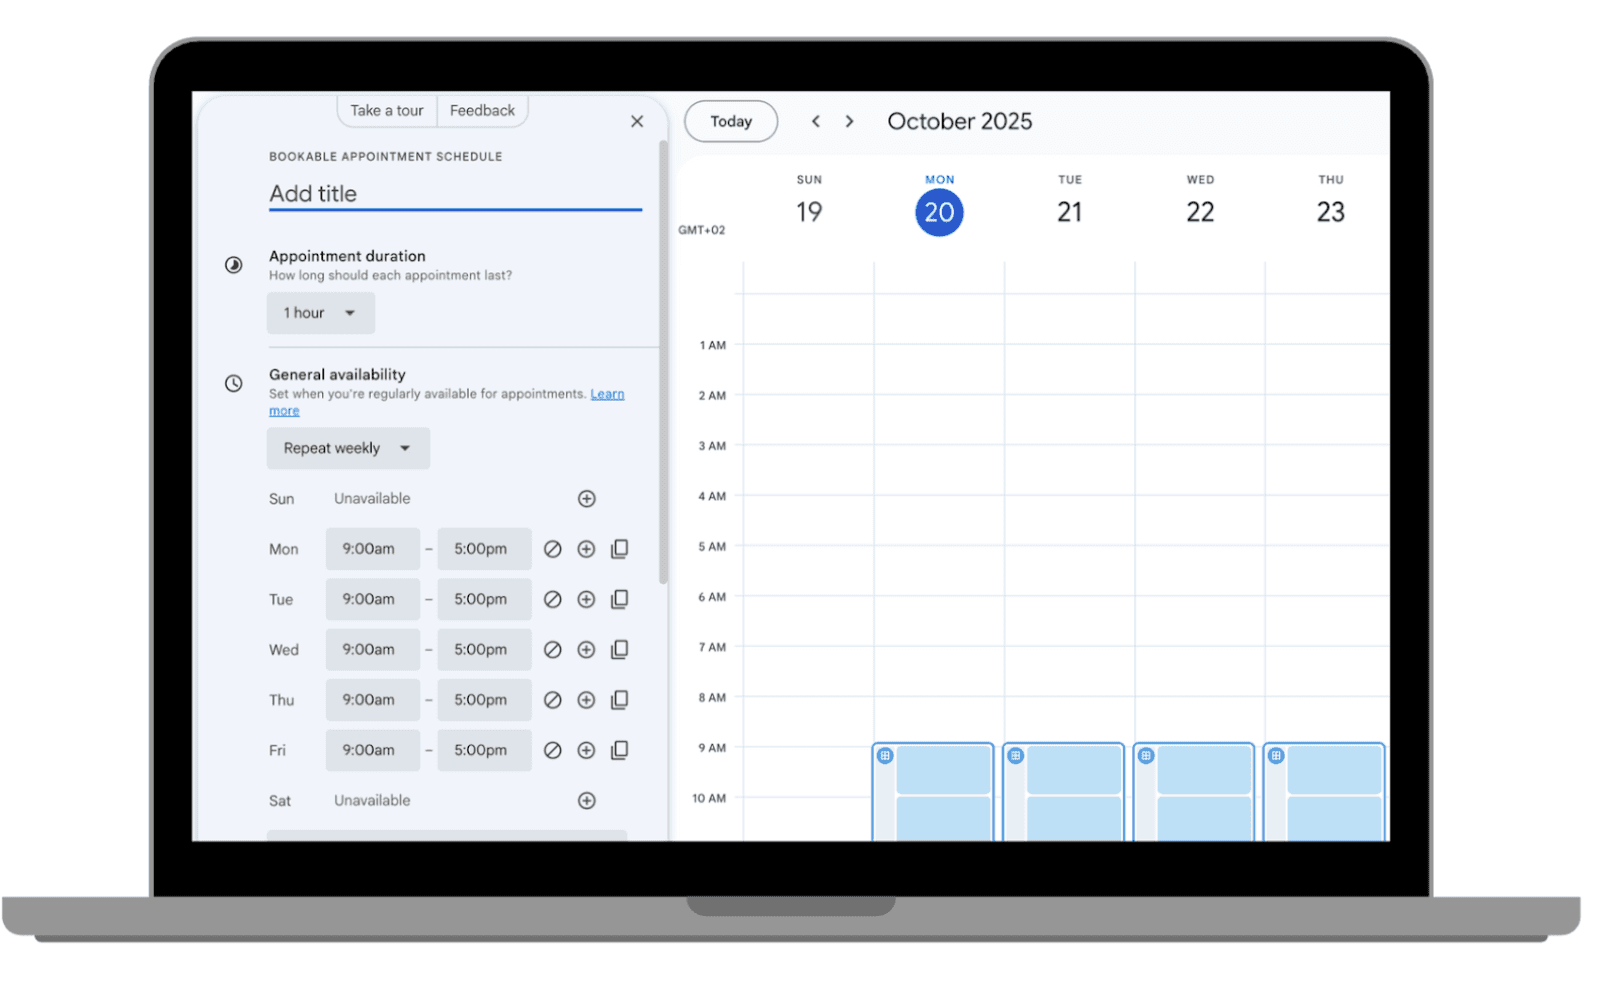
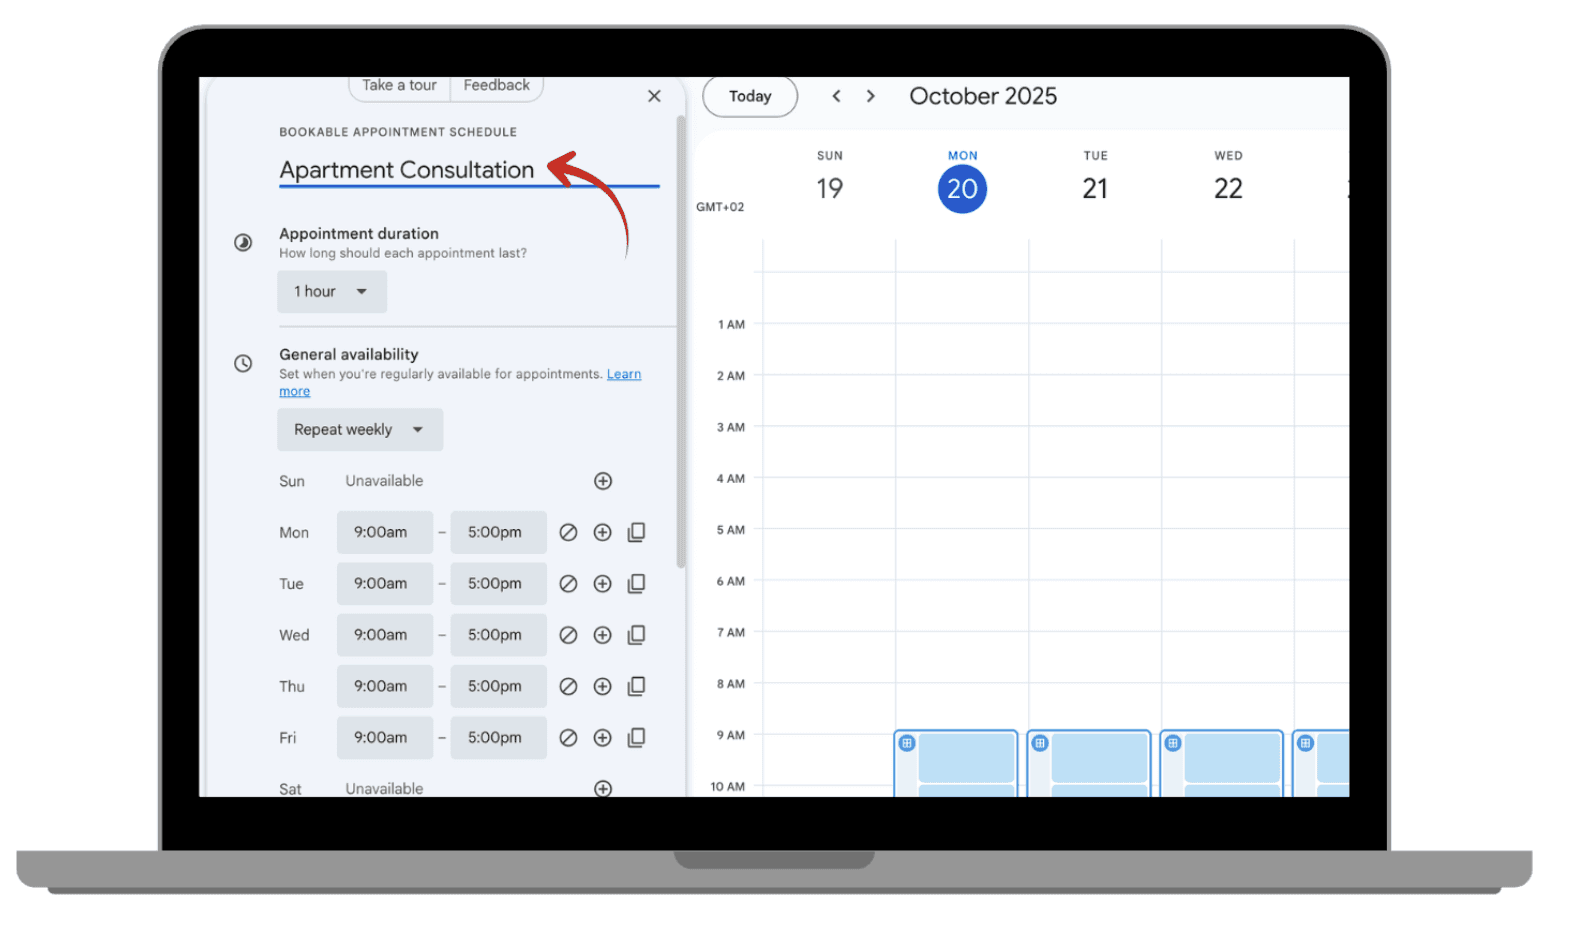
After clicking "Create," enter the title for your booking page (e.g. "Apartment consultation").
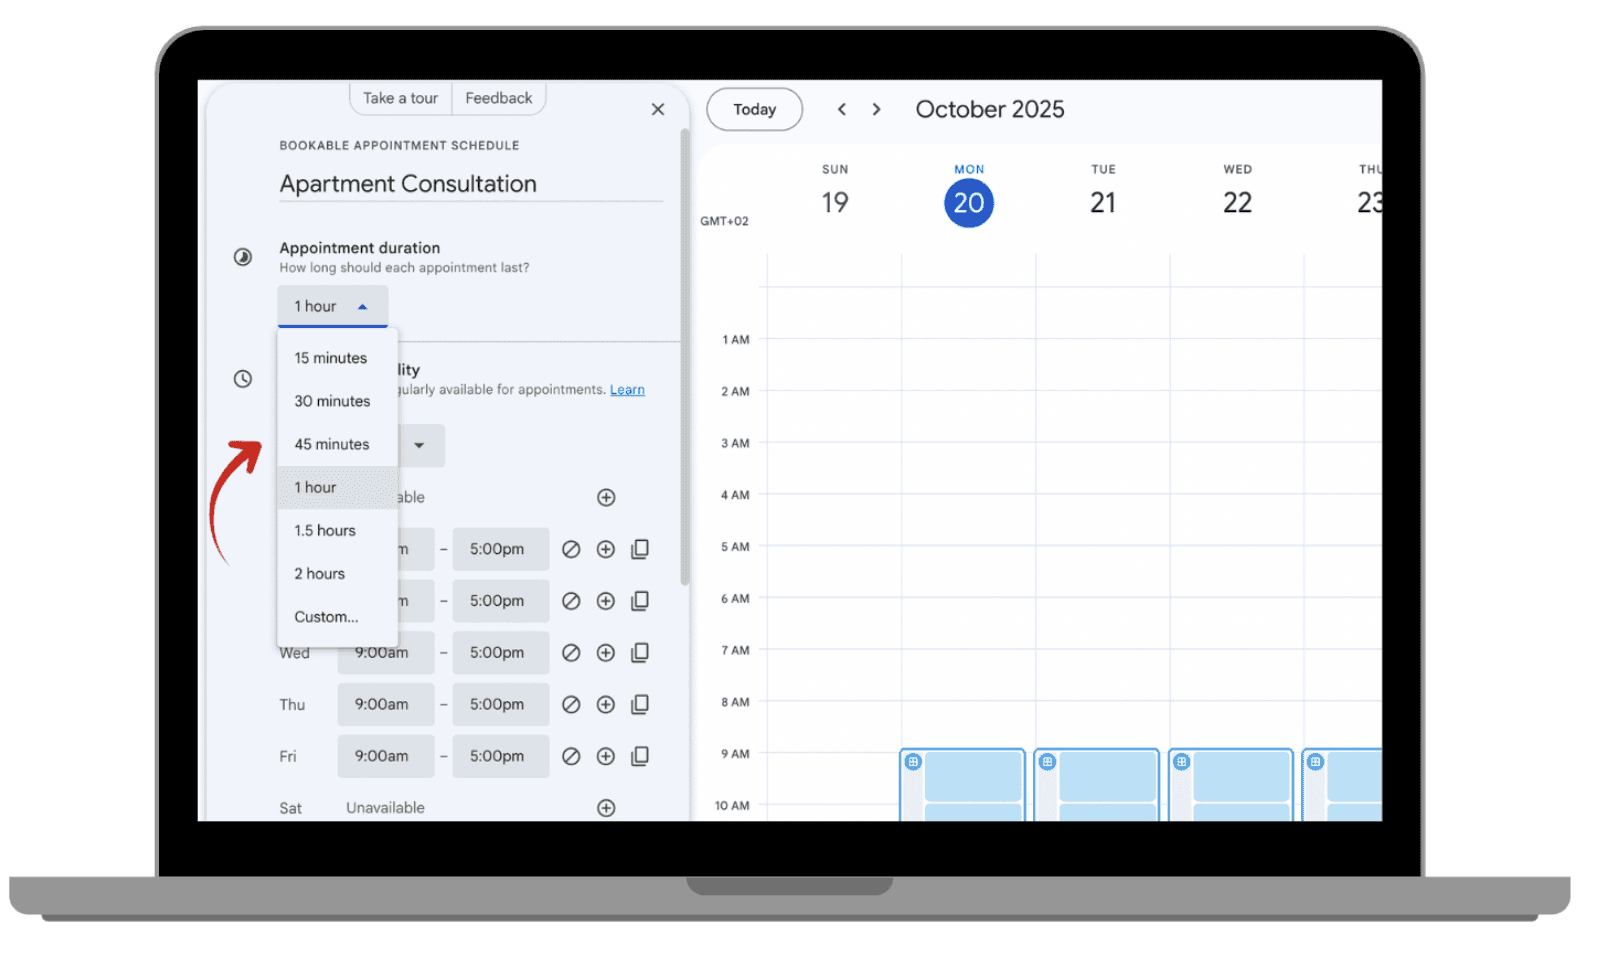
Set the appointment duration with the drop down time options.
You can customize your general availability by adjusting how often you're available and setting specific times for each day.
Choose your time zone settings.
Click ‘Next’.
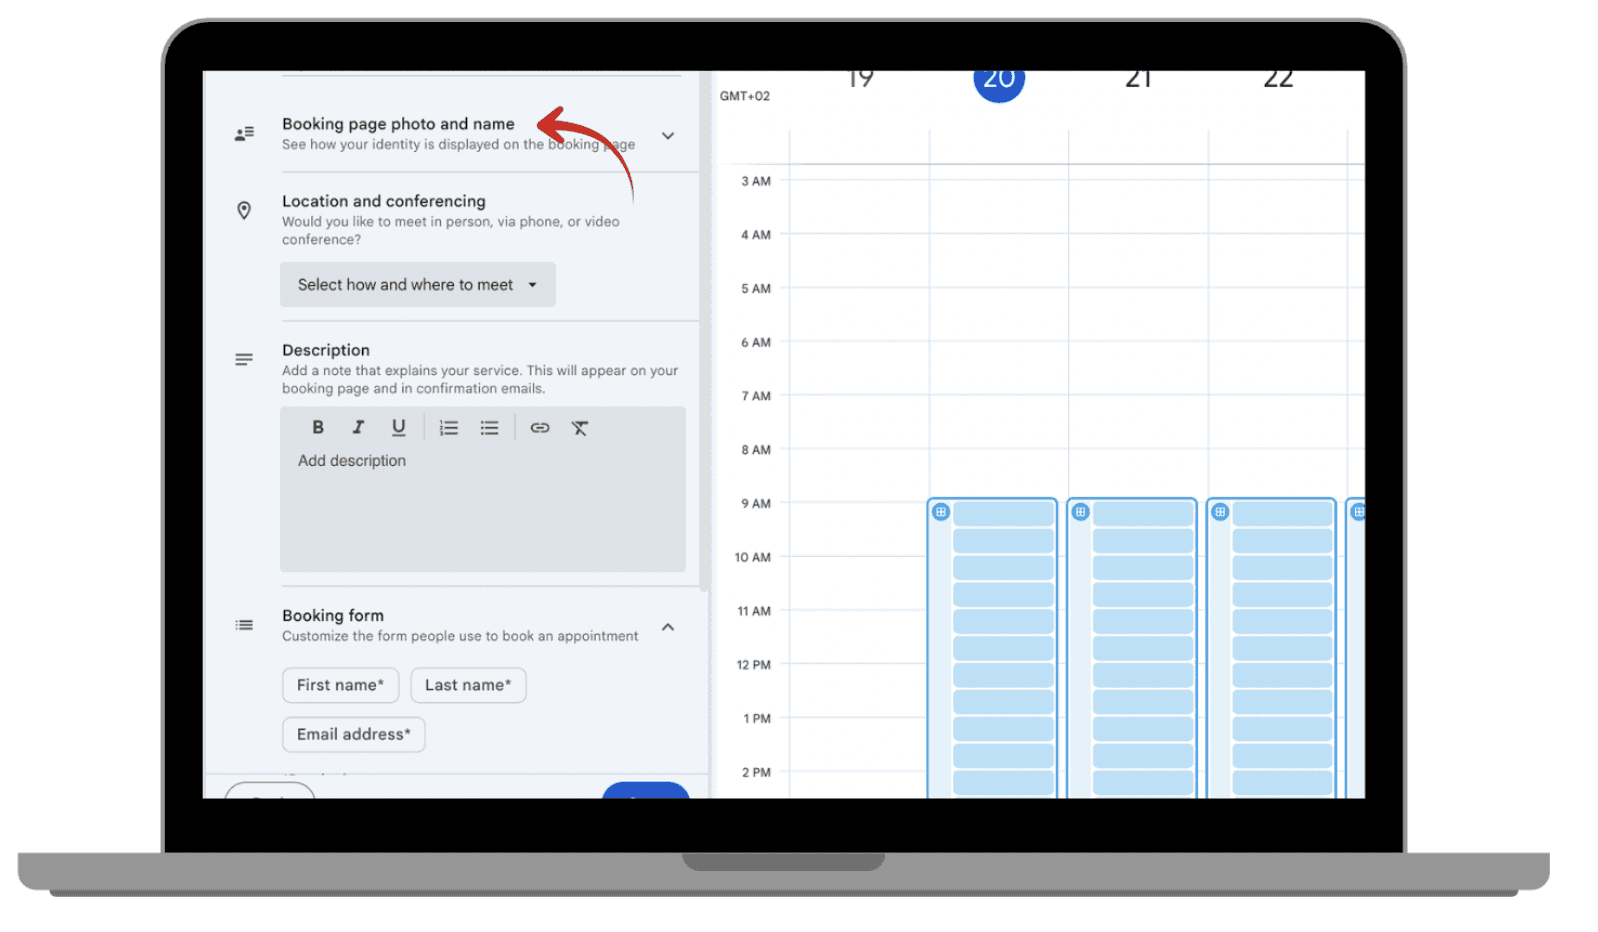
Here you can set your appointment picture and name that will show up for users.
You can set your place of meeting, whether it’s online or elsewhere.
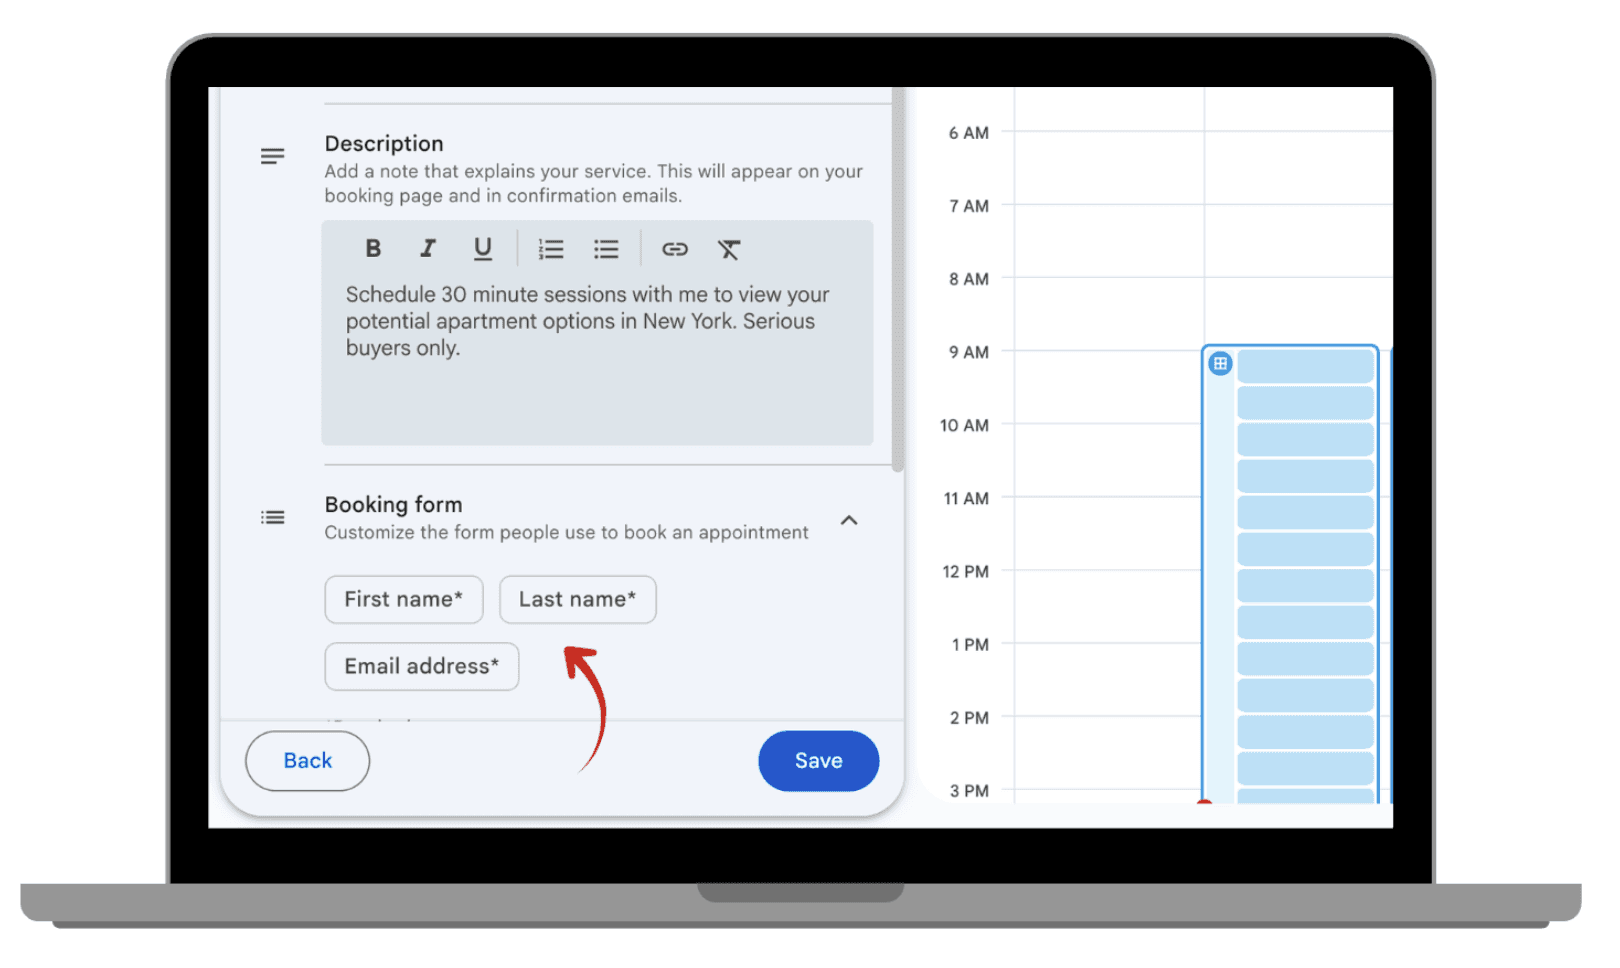
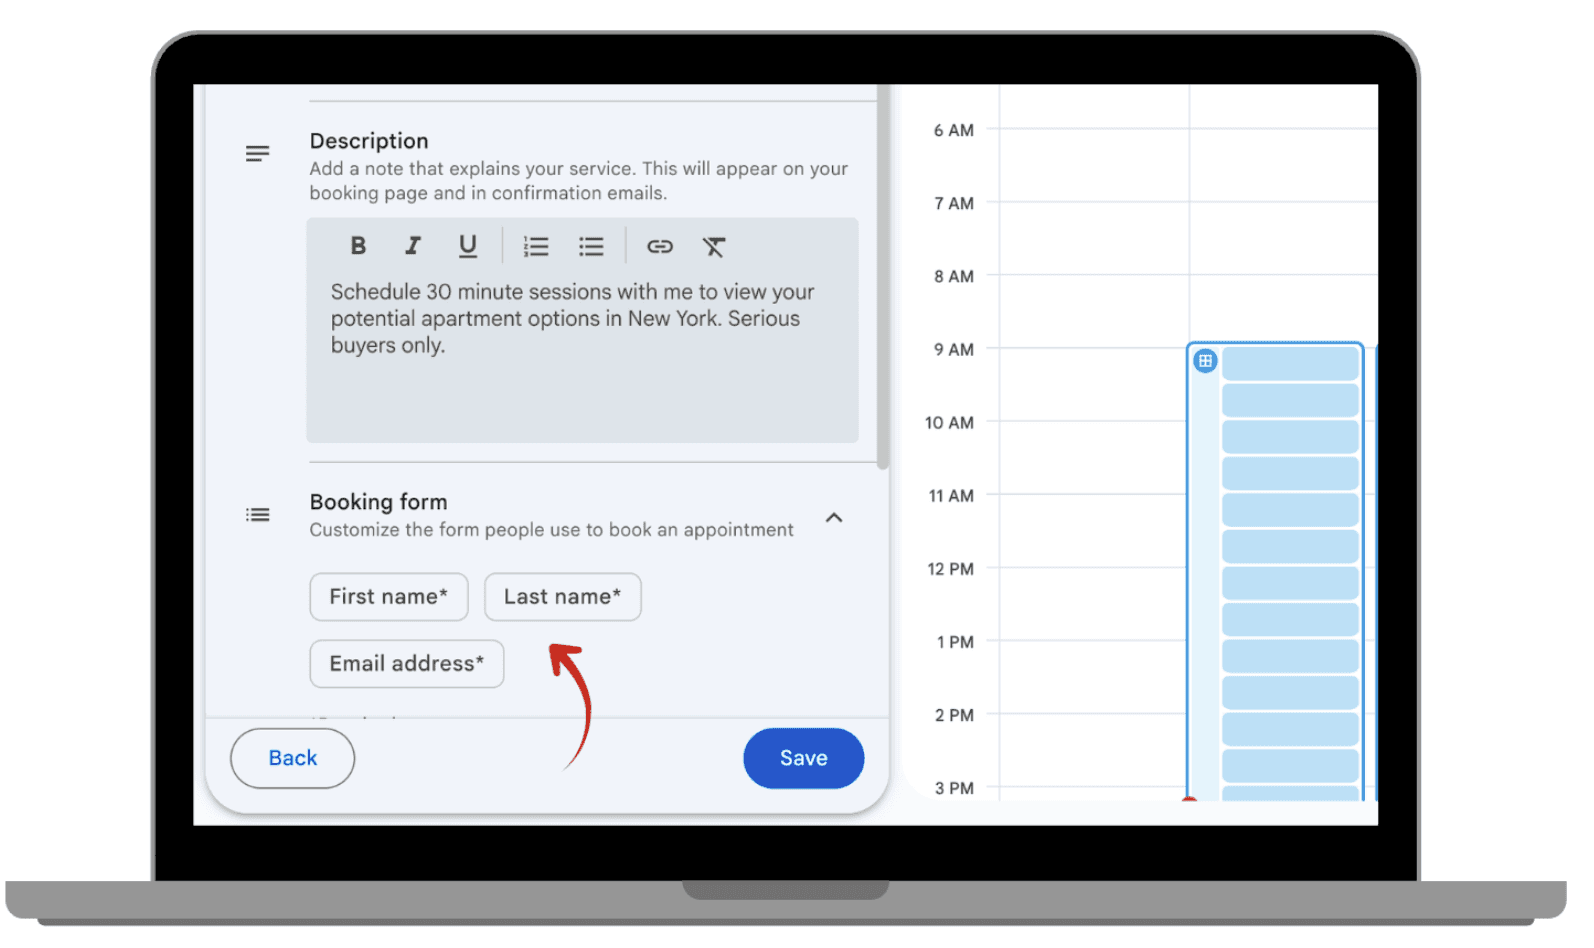
Add a description that explains your service or reason for a meeting.
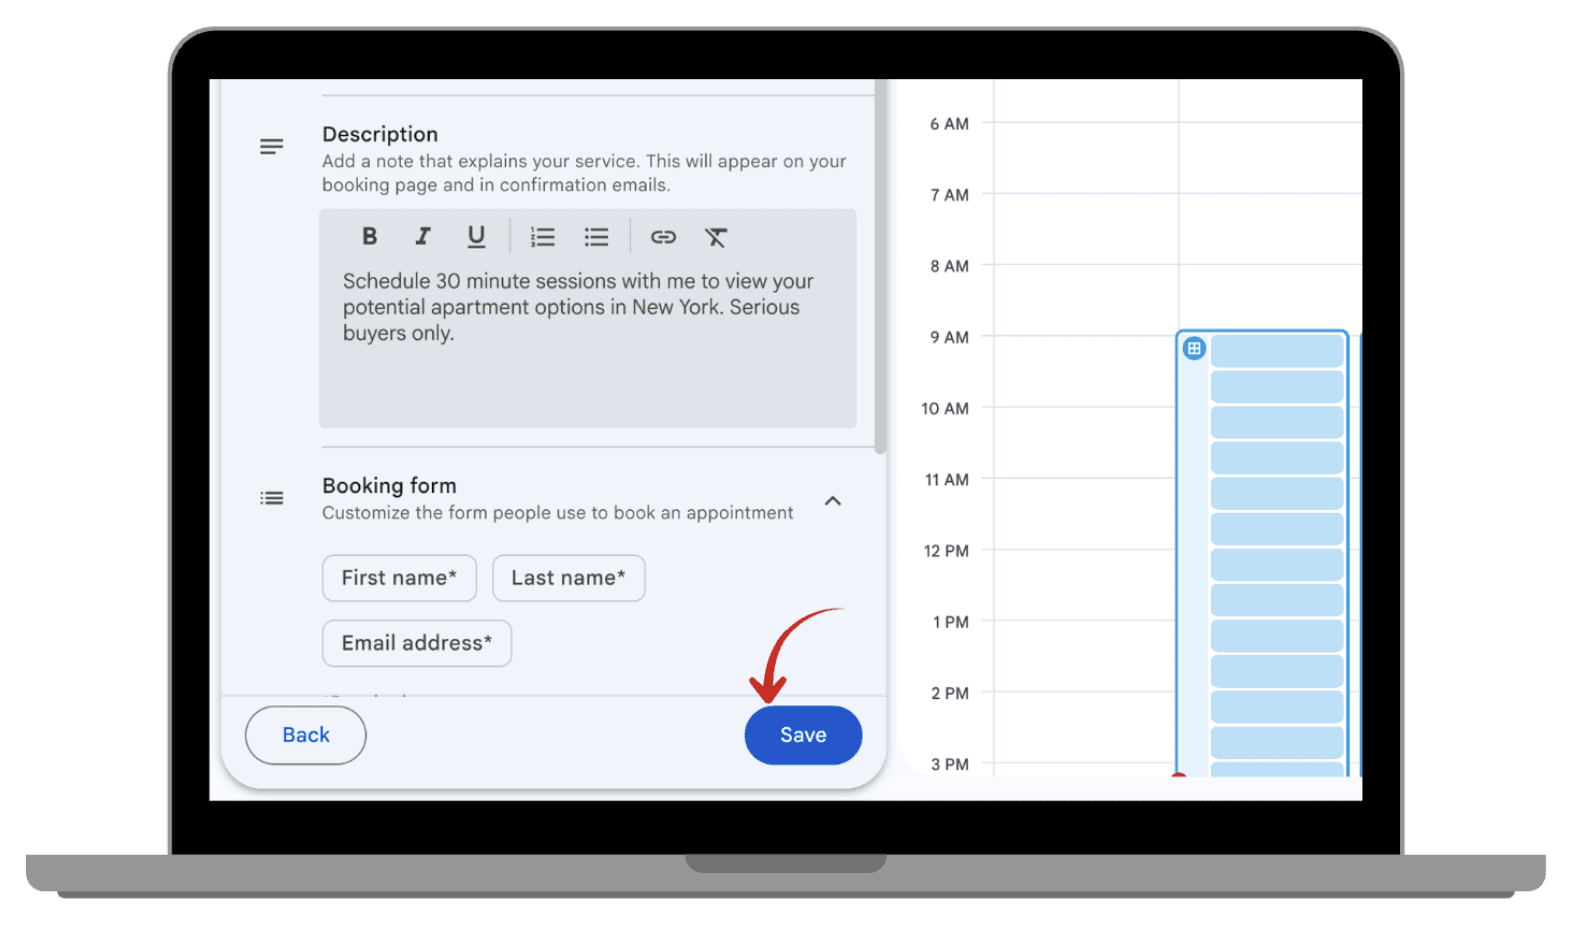
And you can add a section to customize the booking form for people to fill in when setting an appointment.
Save your page.
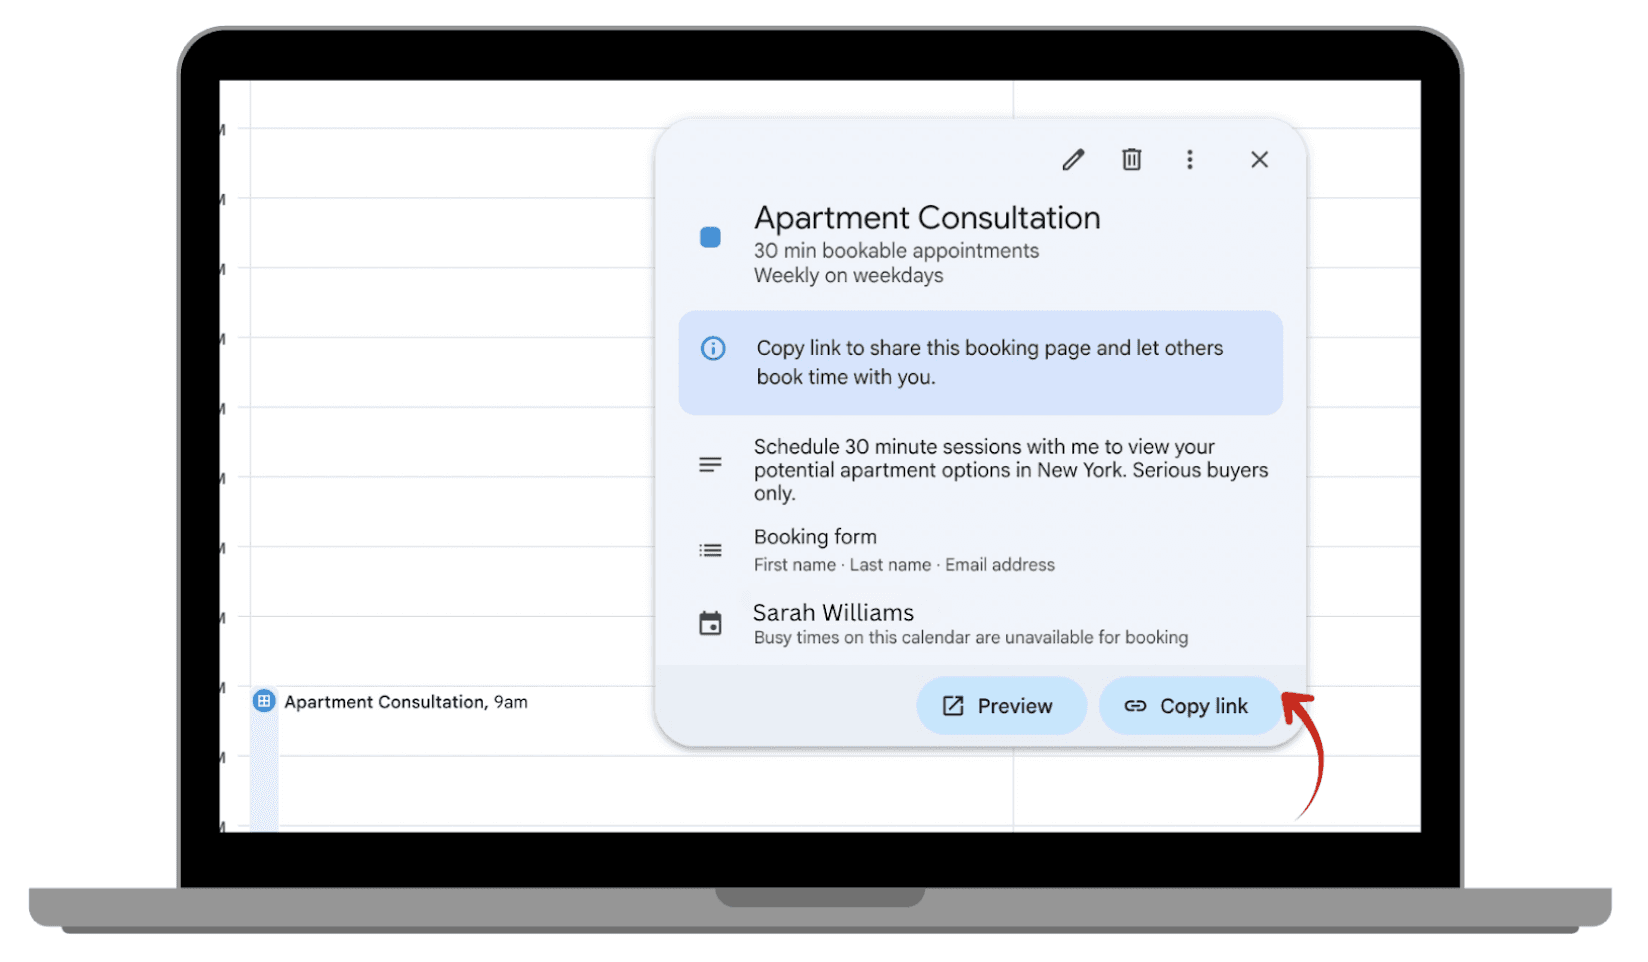
You’ll receive a shareable link to your booking page. This link is what you’ll send to people who want to book time with you.
 |  |
|
|
 |  |
|
|
 |  |
|
|
 |  |
|
|
 |  |
|
|
 | |
|
5. Customizing Your Appointment Schedules
Now that you’ve set up your appointment schedule, the following sections will provide a detailed explanation of its contents and how each part has been customized to match your specific needs and preferences.
5.1. Set Your Availability
After creating your appointment page, click on the “Availability” tab to specify the days and hours when you are available.
Set recurring availability for easy scheduling, if required.
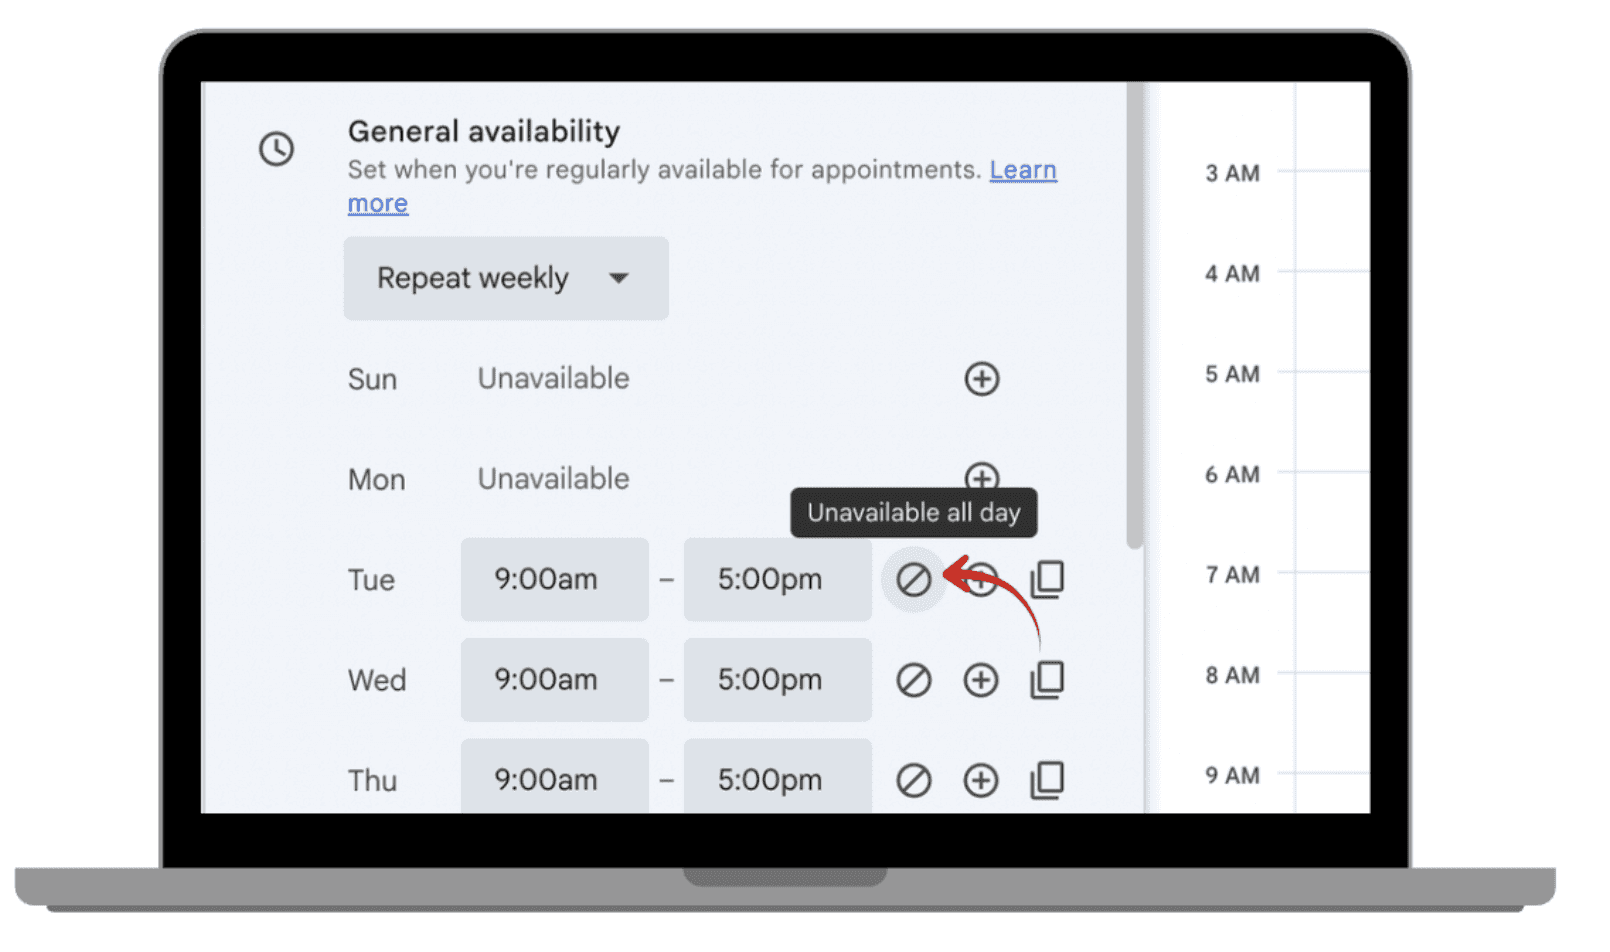
If you need to block off specific days, such as holidays or vacations, just add exceptions to adjust your availability, by clicking the block button.
 |  |
|
|
 | |
|
5.2. Add Appointment Types and Details
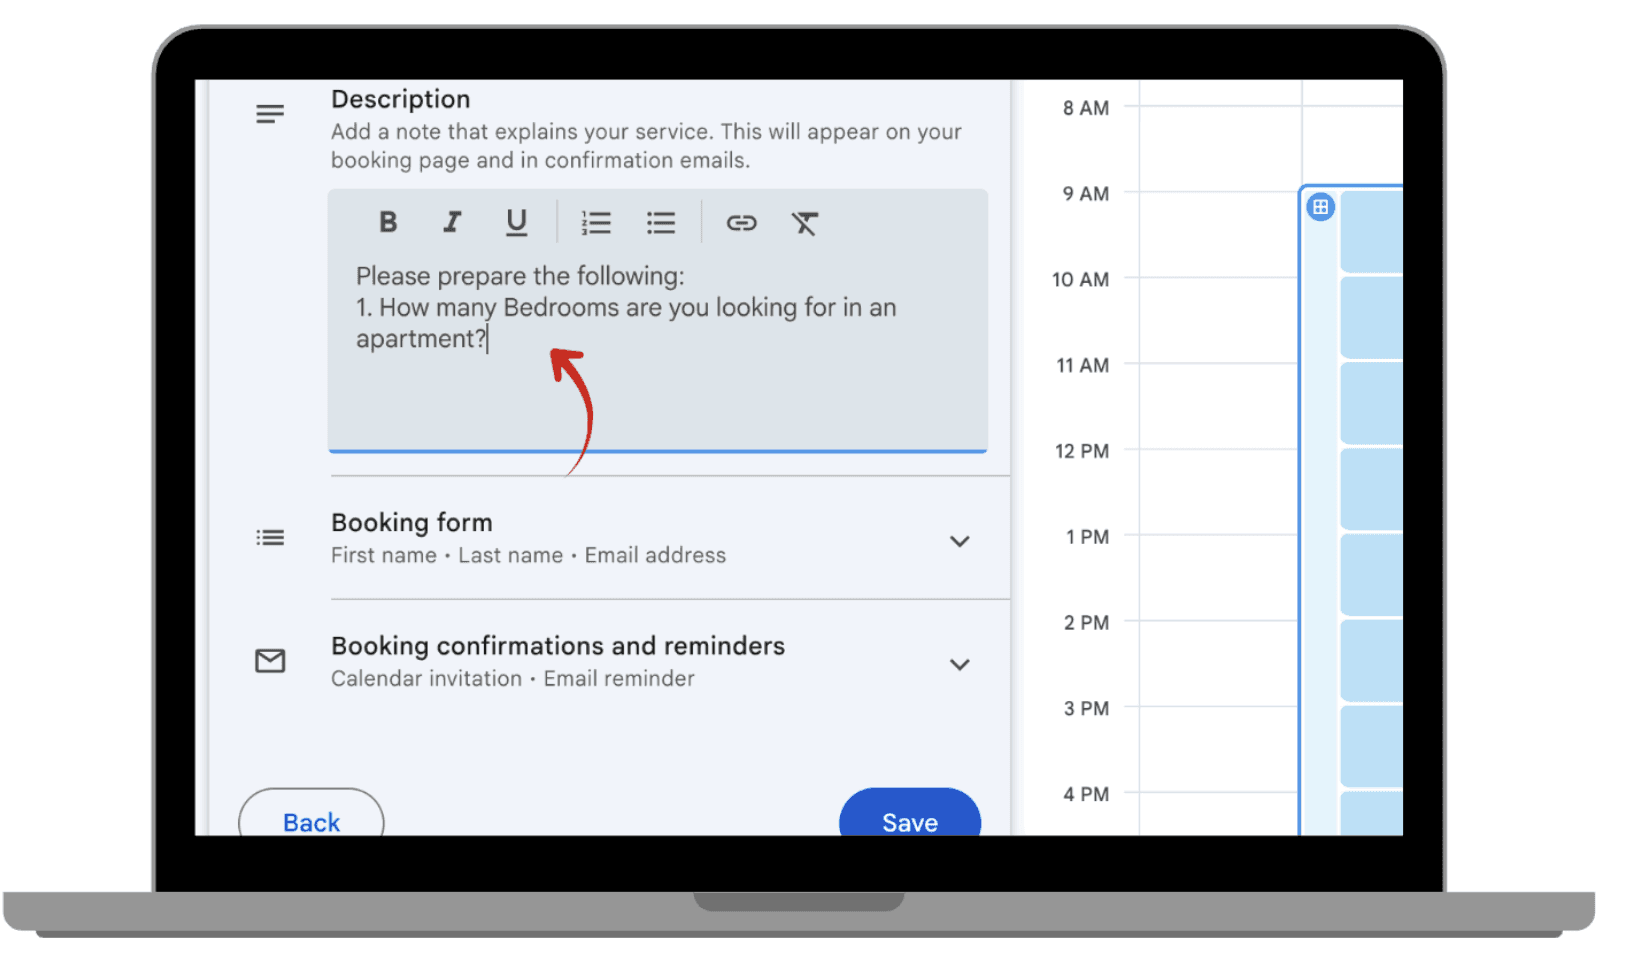
Set the duration for each appointment and provide a description (e.g. “45-minute consultation for project planning”).
You can also include any instructions or questions that the person booking the appointment will need to answer.
 |  |
|
|
5.3. Personalize Your Booking Page
You can change the theme of your page by selecting a color scheme or uploading your company logo.
Add custom questions that people will need to answer before booking with you (e.g. “What would you like to discuss?”).
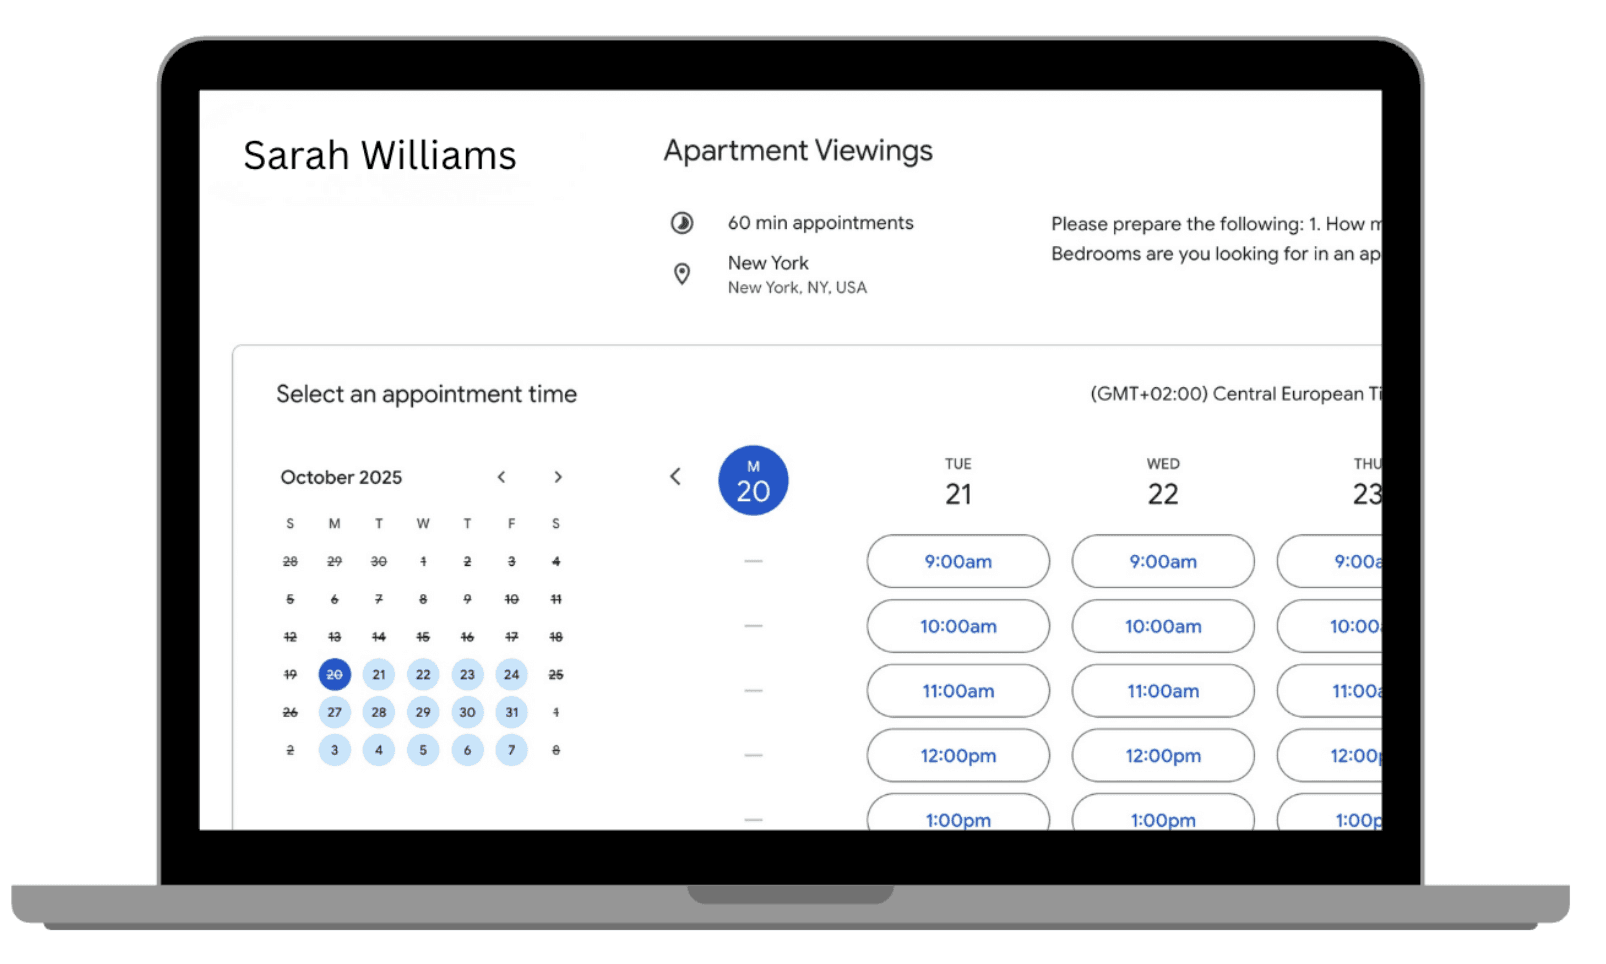
Preview your booking page to ensure it looks just how you want it before finalizing it.
 |  |
|
|
 | |
|
6. Sharing Your Appointment Link
Once your appointment page is ready, here’s how you can share your booking link with others.
6.1. Share Link via Email or Calendar
Once your appointment page is created, click the “Share” button to copy the link.
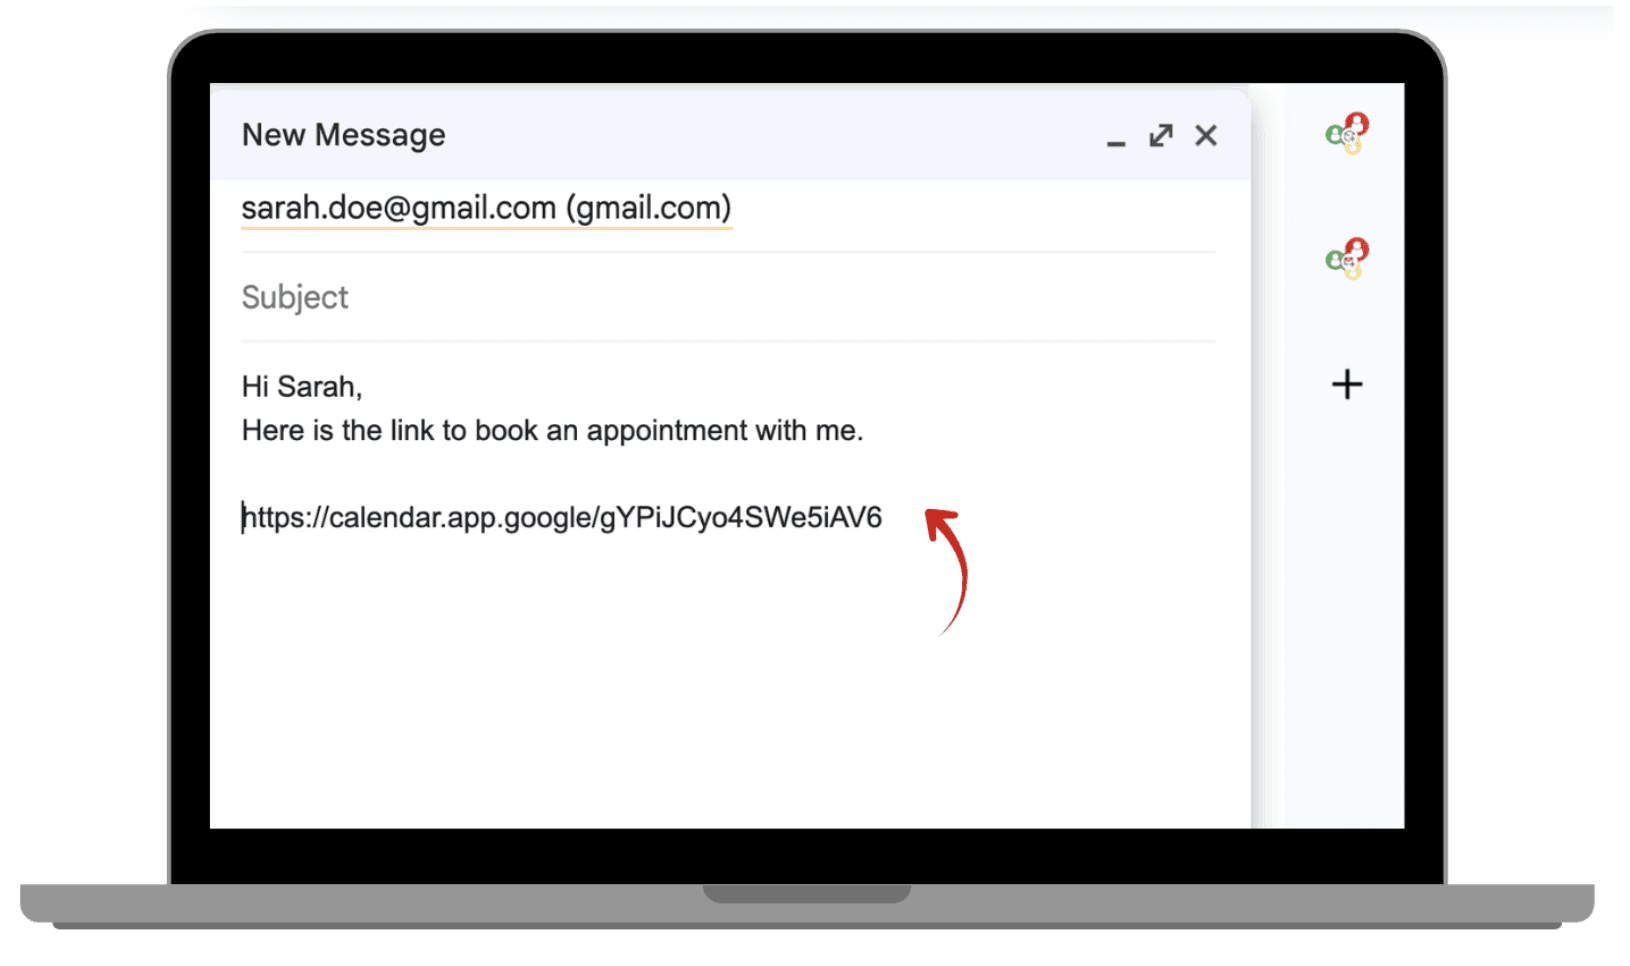
You can send this link directly to people via email, or include it in your Google Calendar invitations so people can book with you easily.
 |  |
|
|
7. Integrating Google Appointment Schedules with Your Google Calendar
Google Appointment Schedules seamlessly integrates with Google Calendar, ensuring that any appointment booked via your link will appear directly on your calendar. You’ll receive notifications for upcoming appointments, keeping you on top of your schedule.
All appointments sync in real-time, and if you make any changes to your availability, your scheduling page will automatically update to reflect those adjustments.
Conclusion
Switching from Calendly to Google Appointment Schedules can be a smooth and cost effective transition, especially for those already using Google Workspace. It’s easy to set up, integrates seamlessly with Google Calendar, and provides enough customization to meet most scheduling needs. With the added benefit of being free, it’s a great alternative for individuals, small businesses, and large enterprises.
Leave a comment :
No comments yet. Be the first!


