How to separate your iPhone Contacts from your Google Contacts
Separating personal and professional contacts on your iPhone protects your privacy and keeps your data organized. This guide explains two practical ways to prevent Google Workspace contacts from mixing with iCloud contacts: keeping work and personal contacts in separate apps using ContactsFlow™, or adding your Google account to iPhone Contacts and filtering by account. Both methods give you better control over visibility, security, and caller ID management.
Two separation methods: You can either use separate apps (iCloud for personal, ContactsFlow™ for work) or use one app and filter contacts by account.
Control your default account: Set iCloud as the default account to prevent new personal contacts from being saved to Google.
Disable Google contact sync (if needed): Turn off Google contact syncing in iPhone settings to fully separate work and personal data.
Use ContactsFlow™ for work management: Manage shared labels, permissions, and professional contacts securely within the app.


Keeping personal and work contacts apart is smart for privacy and organization. If you’ve started using Google Workspace on an iPhone and don’t want your professional data mixed with your private contacts, you have two simple options.
Separate Apps
You won’t find a dedicated Google Contacts app with labels or shared lists in the Apple App Store. If you want to separate your professional and personal life, a good approach is to keep personal contacts in the iPhone’s built-in Contacts app, synced through iCloud. For work contacts, you can use a Google Workspace–connected solution such as ContactsFlow™. This setup ensures your business information stays within the work app, while your personal details remain in your iPhone’s Contacts.
It also allows your organization to better manage security and permissions on contacts.
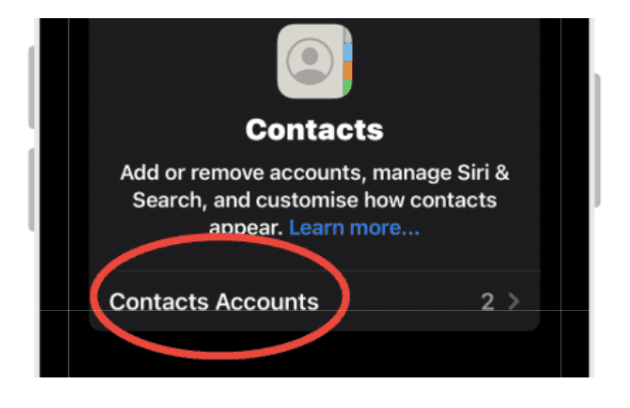
1.1. Make sure your personal contacts stay personal
You need to ensure that only iCloud contacts are synchronized with your device, and not your professional Google Workspace contacts.
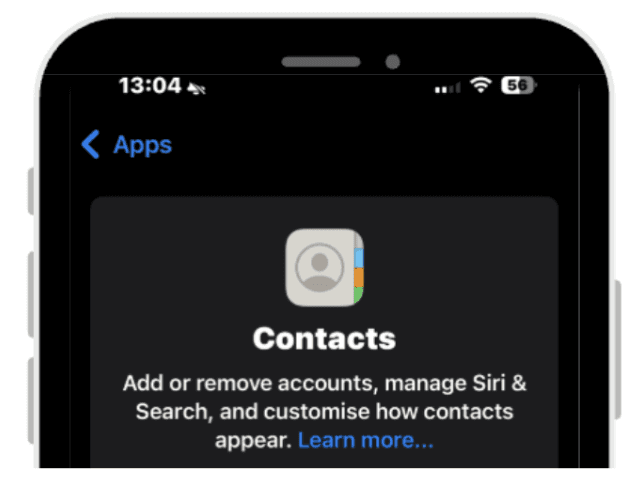
Go to Settings.
Click on Contacts.
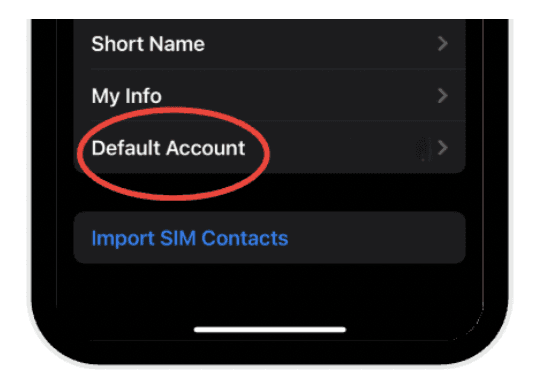
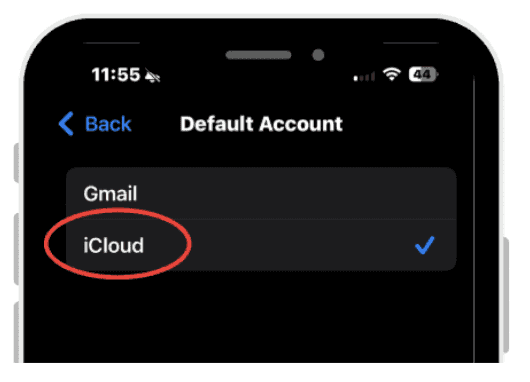
Scroll and tap Default Account.
Ensure iCloud is selected.
 |  |
|
|
 |  |
|
|
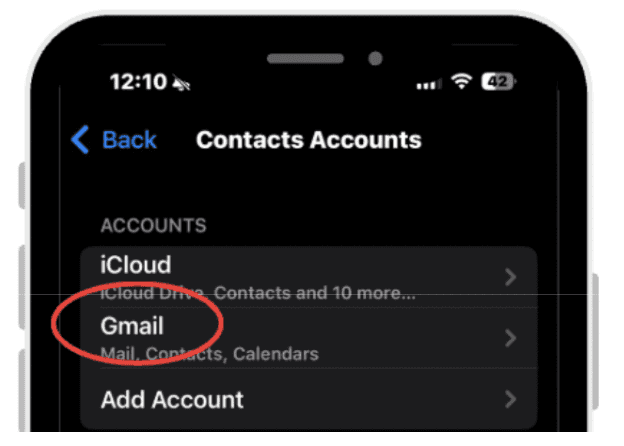
Do not add your Google account to iPhone Contacts. If you already did :
Go to Settings.
Click on Contacts.
Go to accounts.
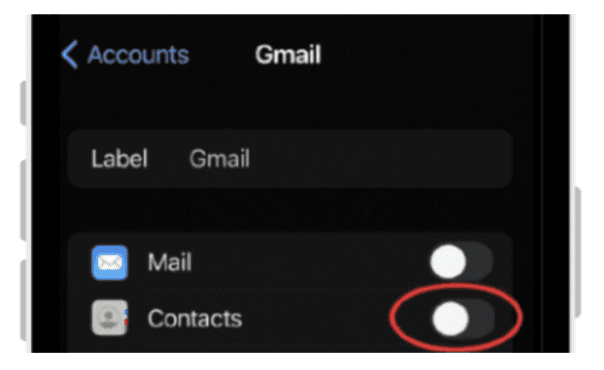
Click on google.
Turn Contacts Off.
This ensures that your apple contacts wont show up on the app.
| |
|
|
 |  |
|
|
 | |
|
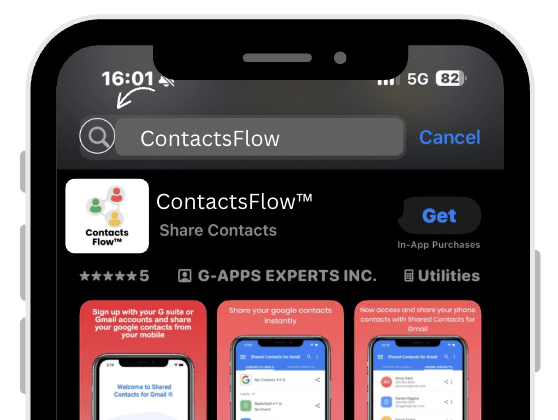
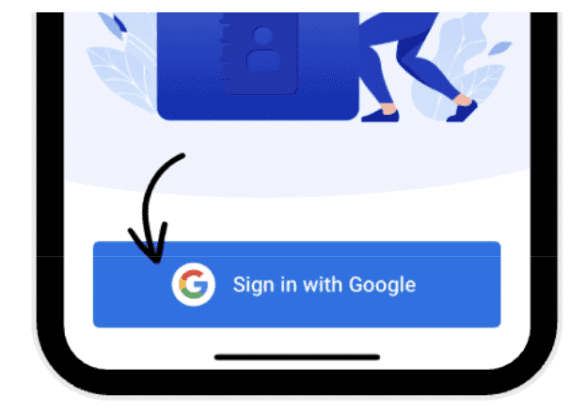
1.2. Install ContactsFlow™
Now you will need an app to see and manage your organization contacts :
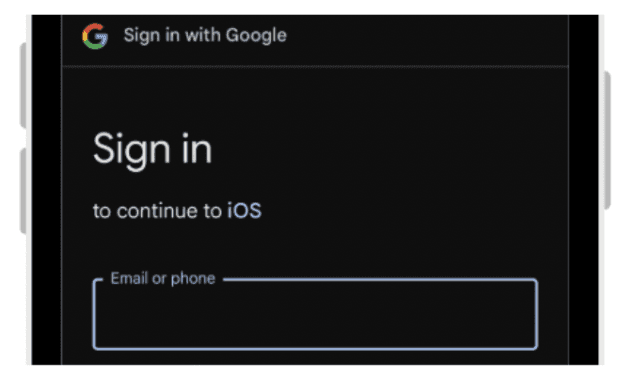
Install ContactsFlow™ on your iPhone.
Sign in with your Gmail and allow access to contacts.
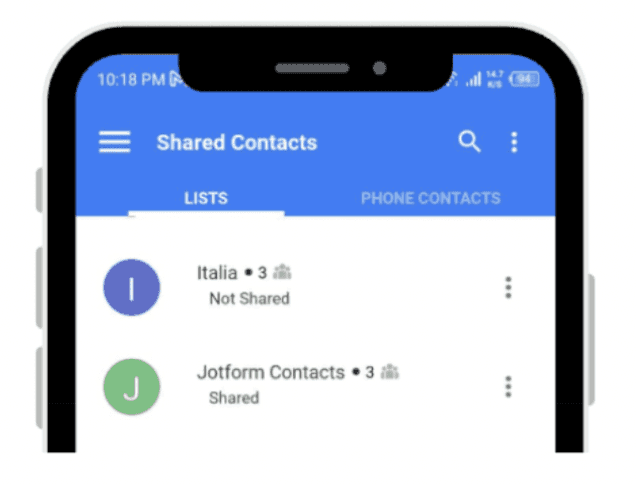
Now you can manage work contacts on the app.
Create labels, lists, share and edit contacts.
 |  |
|
|
 |  |
|
|
Now you can store work numbers in ContactsFlow™ and personal details, like a friend’s birthday in your iPhone Contacts.
Filter your Gmail Contacts from your iCloud contacts
After you add your Google account to the iPhone Contacts app, you can filter by account (via Lists) so Gmail and iCloud contacts display separately, they aren’t merged or mixed with each other.
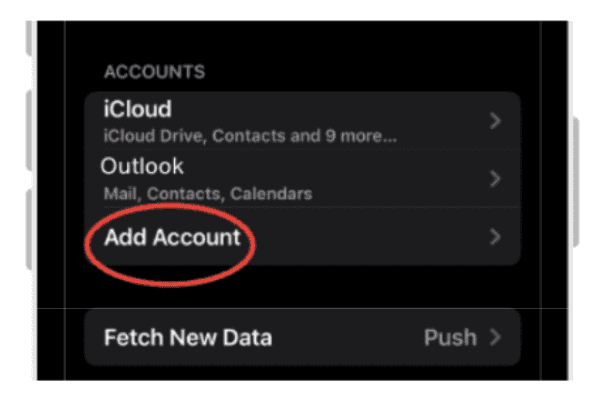
To add your gmail account to iPhone,
Go to Settings.
Click on Contacts.
Click on Accounts.
Press Add Account.
Choose Google and sign in.
Turn Contacts On for google.
| |
|
|
|  |
|
|
 |  |
|
|
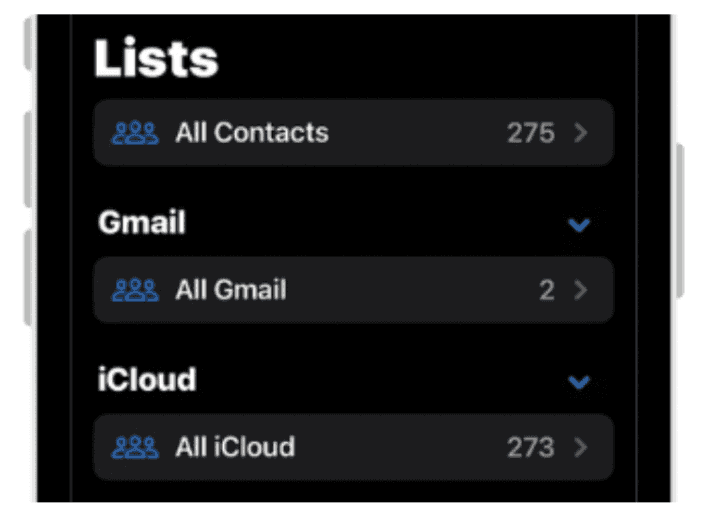
Now on your contacts app you can choose what you prefer to open, your iCloud contacts, your gmail contacts, or all of your contacts.
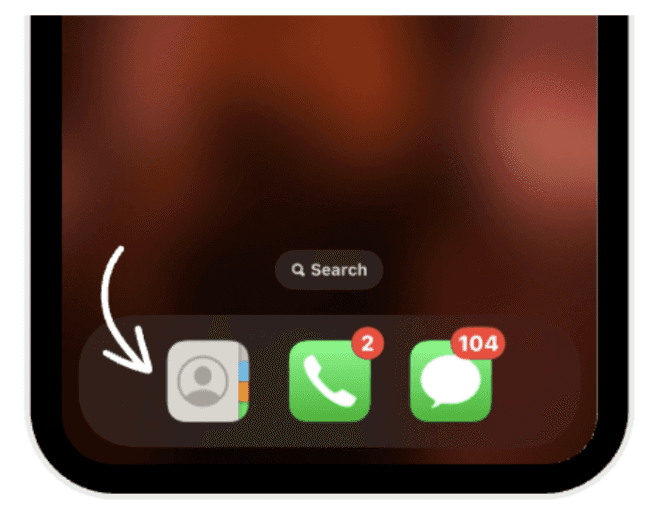
Open the contacts app.
View Lists.
 |  |
|
|
Whether you keep work and personal contacts in separate apps or add your Google account to iPhone Contacts and filter by account, both methods prevent mixing and give you control. Choose the approach that matches your habits: a strict split with two apps, or a single app with clear filters.
If caller ID for work numbers matters, consider the filtered single-app setup. The key is to pick one workflow and stick to it so your contact data stays organized and private.
Leave a comment :
No comments yet. Be the first!


